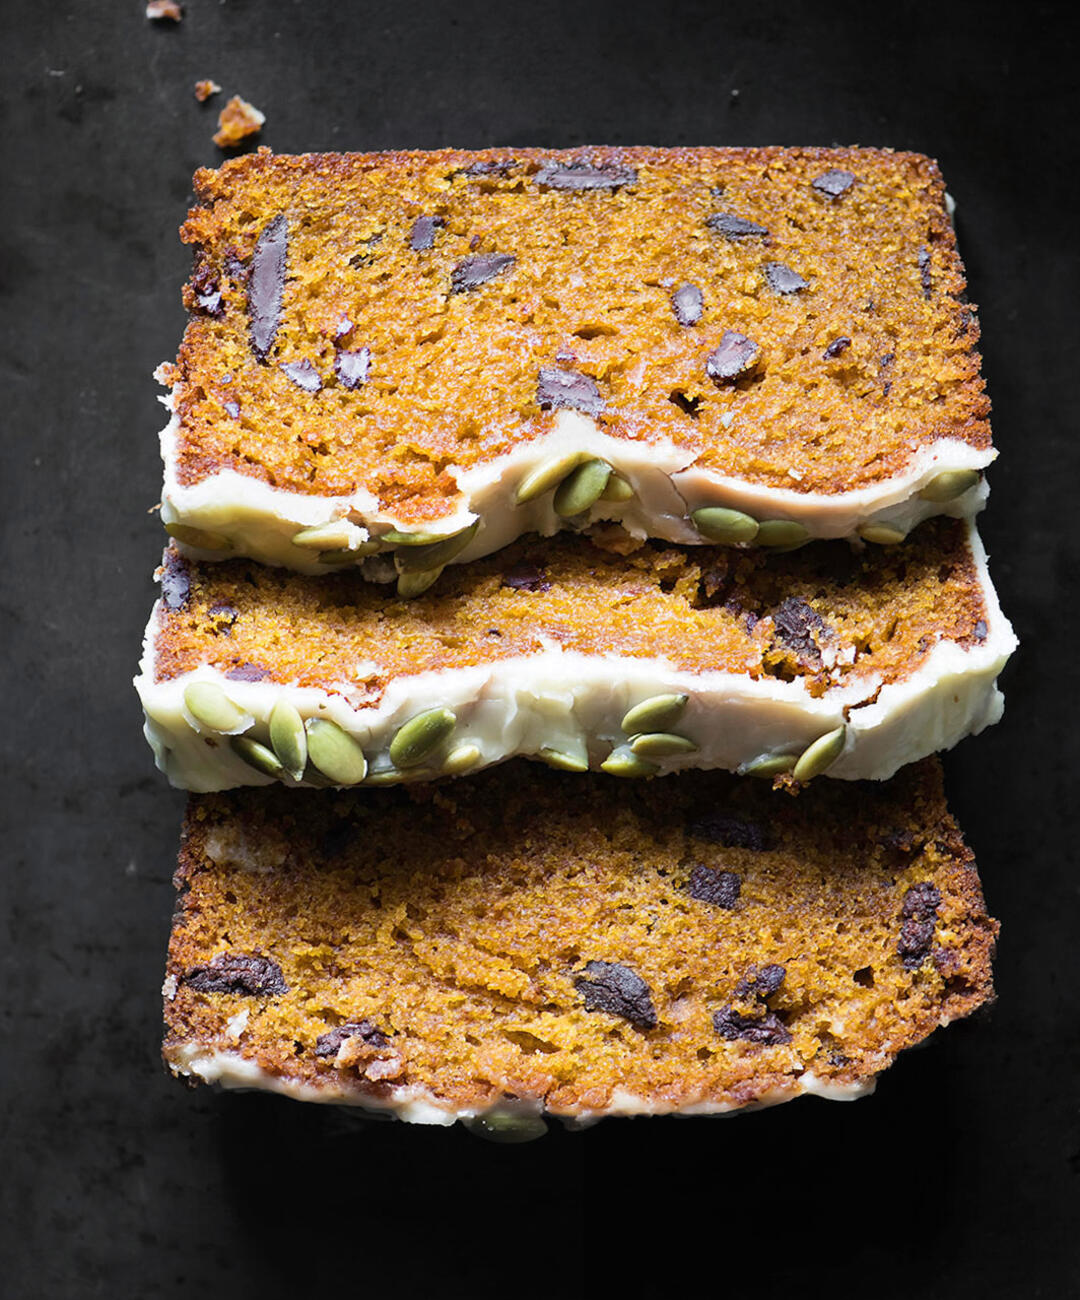
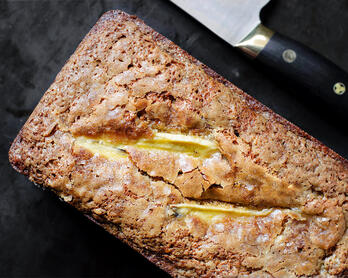
Kabocha, Olive Oil, and Bittersweet Chocolate Cake
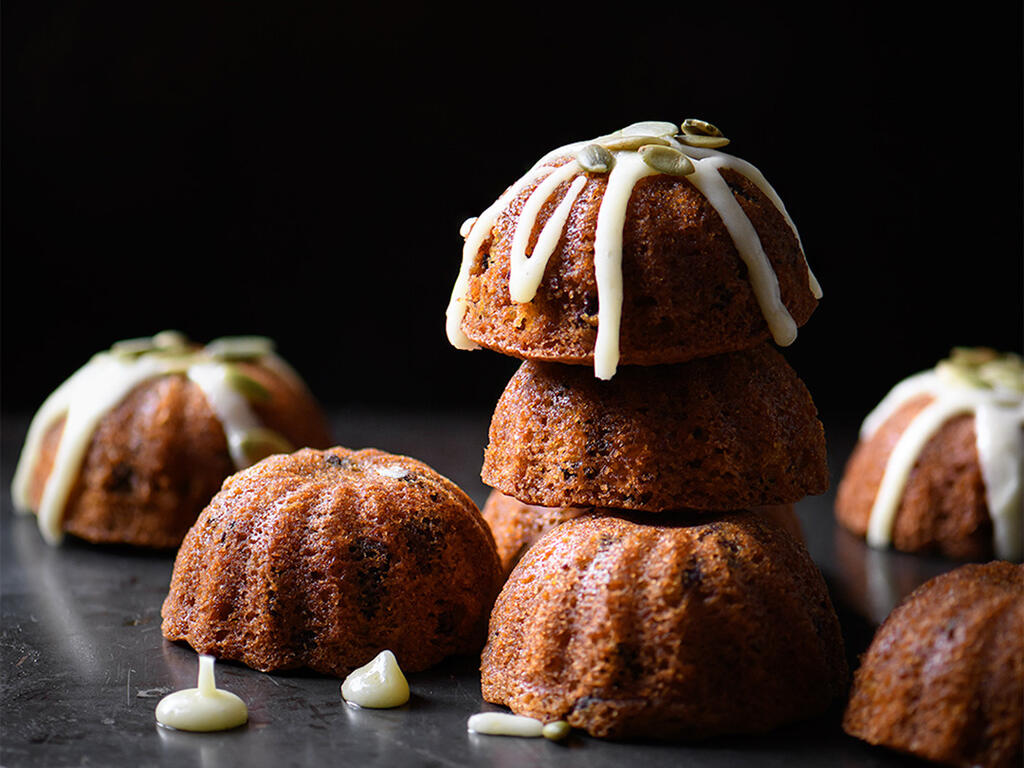
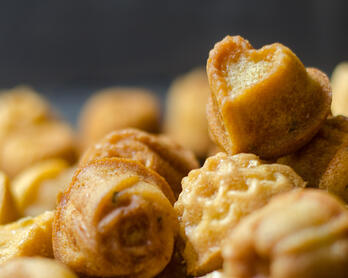
Gjelina's Kabocha, Olive Oil, and Bittersweet Chocolate Cake had been sitting on my impractically long "To Make" list for a while. After picking up some kabocha squash from Jimenez Family Farm, I made this recipe over the holidays and it promptly became my coffee's best friend. The texture is surprisingly tender and the balance of sweet roasted squash, fruity olive oil, and bittersweet chocolate is wonderful. The recipe in the Gjelina cookbook uses a 9x5 loaf pan, so for my second attempt I made mini cakes. I have a soft spot for individual servings which made the little bundts a happy 3-bite treat. You can't go wrong with either size and bonus that the shelf life is excellent. Makes for an especially delicious road or camping trip treat. I also made 3x5 loaves but didn't get a picture. Bake times included below for each of the pans I used.
The "Recipe Tips" section includes some expanded notes on how to achieve the kabocha cake's full potential when it comes to texture. There's nothing tricky about this recipe, but there are a handful of considerations as you move through the process. I also go on a small side excursion regarding chocolate.
Additional posts from the Gjelina Cookbook include Pomodoro Sauce, Tomato Confit, Garlic Confit, and Pan-Roasted Romanesco with Golden Raisins, Tahini, & Sumac. Chef Lett's recipes are worth having on your bookshelf.
Mental Jaunt
I was wandering through Whole Foods Amazon trying to find some bars of 70% chocolate and noticed that Ghirardelli labels 60% cacao chips as "bittersweet". Then I recalled that Guittard labels 66% cacao chips as "semisweet" which perplexed me. I looked at my husband and said, "Well, The Google and I are going to have to talk about this later."
It turns out that there aren't many helpful standards for chocolate. This is puzzling since chocolate is a complex ingredient and can have a significant impact on whatever recipe it's featured in. The FDA lumps bittersweet and semisweet chocolate together, requiring only 35% cacao for a product to be called by either name. Going by FDA standards, chocolate that's 66% cacao can be labeled semisweet or bittersweet depending on how a company chooses to market it. My uneducated guess is that, similar to what happened with the homogenization of flour, chocolate ended up in large and vaguely defined categories as company's like Hershey's came to dominate the candy scene. Though I didn't do a deep dive on the subject, here are my two cents (subject to change as I learn more).
When buying chocolate, I ignore the words "bittersweet" and "semisweet" since manufacturers apply them differently. I look for cacao percentages and then use the ranges below as a point of reference. Finally, I taste the chocolate to determine what I prefer for the respective recipe. For the kabocha cake in this post, I prefer the bottom end of the bittersweet scale.
- Milk 30-45%
- Semisweet Dark 60-69%
- Bittersweet Dark 70-79%
- Very Dark 80%+
Recipe Tips
Chocolate
Dovetailing onto the "Mental Jaunt", it's helpful to keep in mind that bitterness is often perceived differently from person to person. This is why some people recoil from brussels sprouts (my heart goes out to you) and others love them. The same goes for dark or bittersweet chocolate. My qualification is intended to emphasize that the percentage of cacao in your bittersweet chocolate is personal preference. I tried both 74% and 70% chocolate and preferred the 70% Valrhona bars. I suppose 66% could also work, you just don't want the chocolate to be too sweet or the cake's flavor may become cloying. Also, if you're a fan of podcasts, consider listening to Gastropod's "The Bitter Truth" episode.
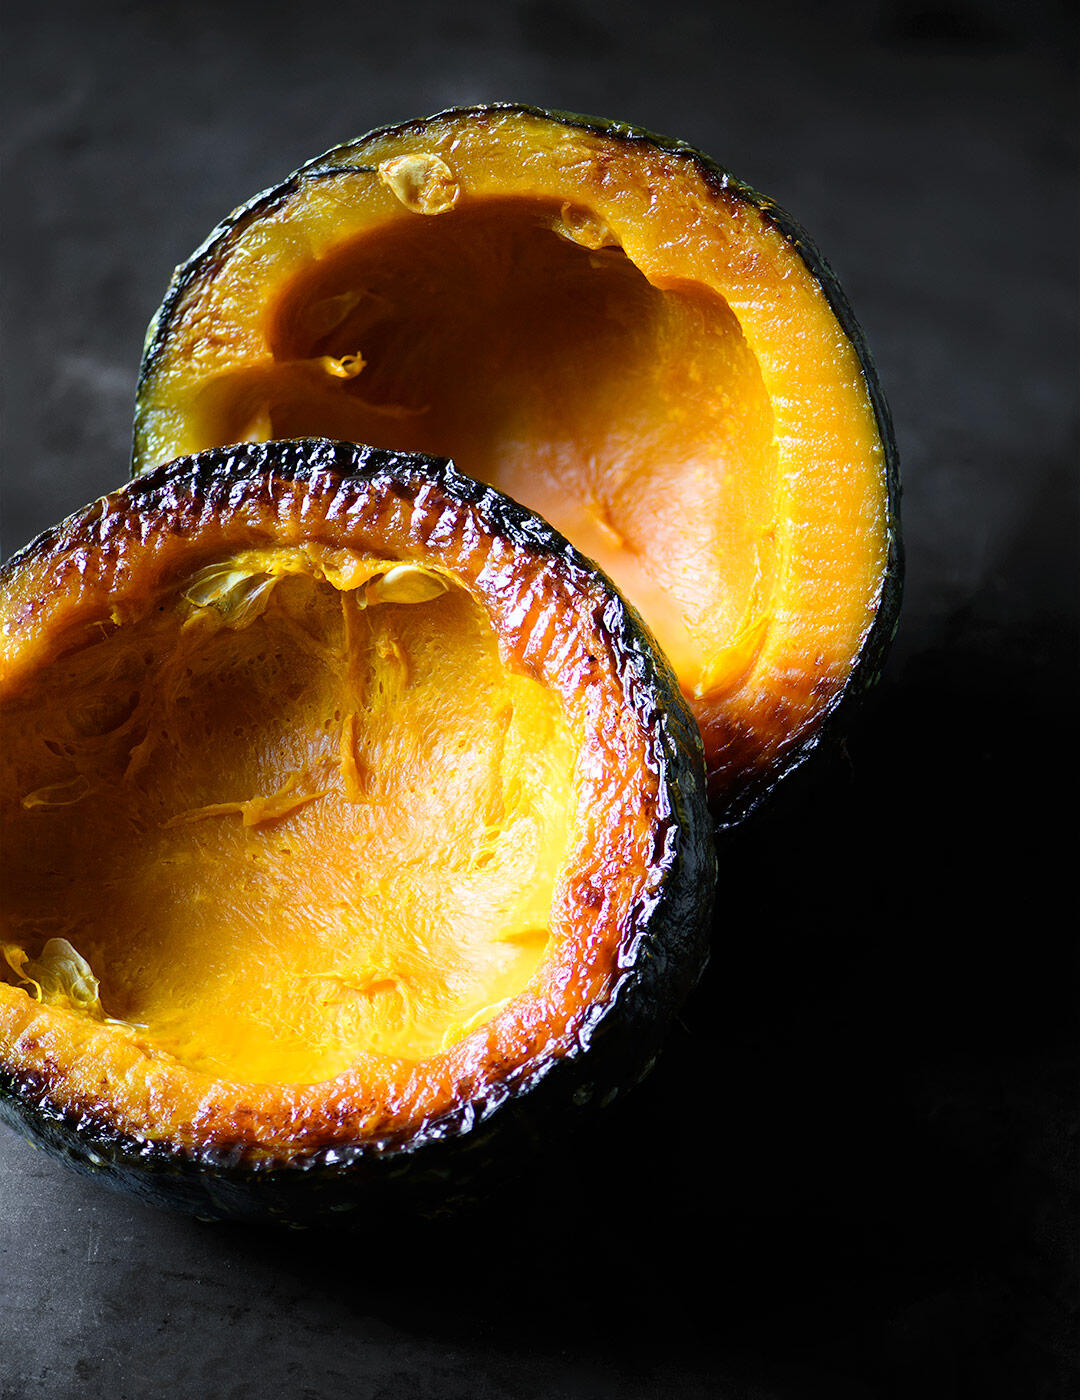
Water Content
Squash has a high water content so the roasting and draining process is key to achieving an ideal texture. I rely on my scale when it comes to these kinds of processes and recommend you do the same. To illustrate this point, a 1-pound piece of squash (as is called for below) roasts down to roughly 7-8 ounces of flesh which is then reduced to 5 1/4 ounces. Even considering the weight of the skin, that's over a half cup of water that could ruin your wonderful creation. On that note...
Draining vs. Paper Towels
Keeping it real, my method for finishing the squash is more wasteful than the one called for in the book. Chef Lett suggests draining the roasted squash for about 4 hours to remove excess water. For pumpkin cheesecake, roasted pumpkin pie, and Tartine's Pumpkin Tea Cake, I use the paper towel method (explained below). If patience is your virtue, by all means wrap the squash in cheesecloth and drain it in the refrigerator. Just make sure you end up with the correct final weight.
Don't Overmix
Put the whisk down and nobody gets hurt. As with many recipes where gluten is at play, you only want to work the batter as much as is absolutely necessary. The opposite is true for naturally-leavened sourdough bread, but we'll get to that in a different recipe. The minute you add moisture to flour and start stirring, those wondrous gluten strands are strengthening and weaving their way into the texture. This isn't a good thing for tender treats such as kabocha cakes. Relevant notes included under "Instructions".
Oil vs. Butter
When I was experimenting with my mini cakes, I greased half of the tray with butter and the other with olive oil for fun. Without question, butter was the better grease for this particular recipe. Kind of a useless fact but I found the difference to be interesting.
Make Ahead
The kabocha squash can be roasted, drained, and refrigerated a day or two in advance. Just be sure to bring it up to room temperature before mixing your batter.
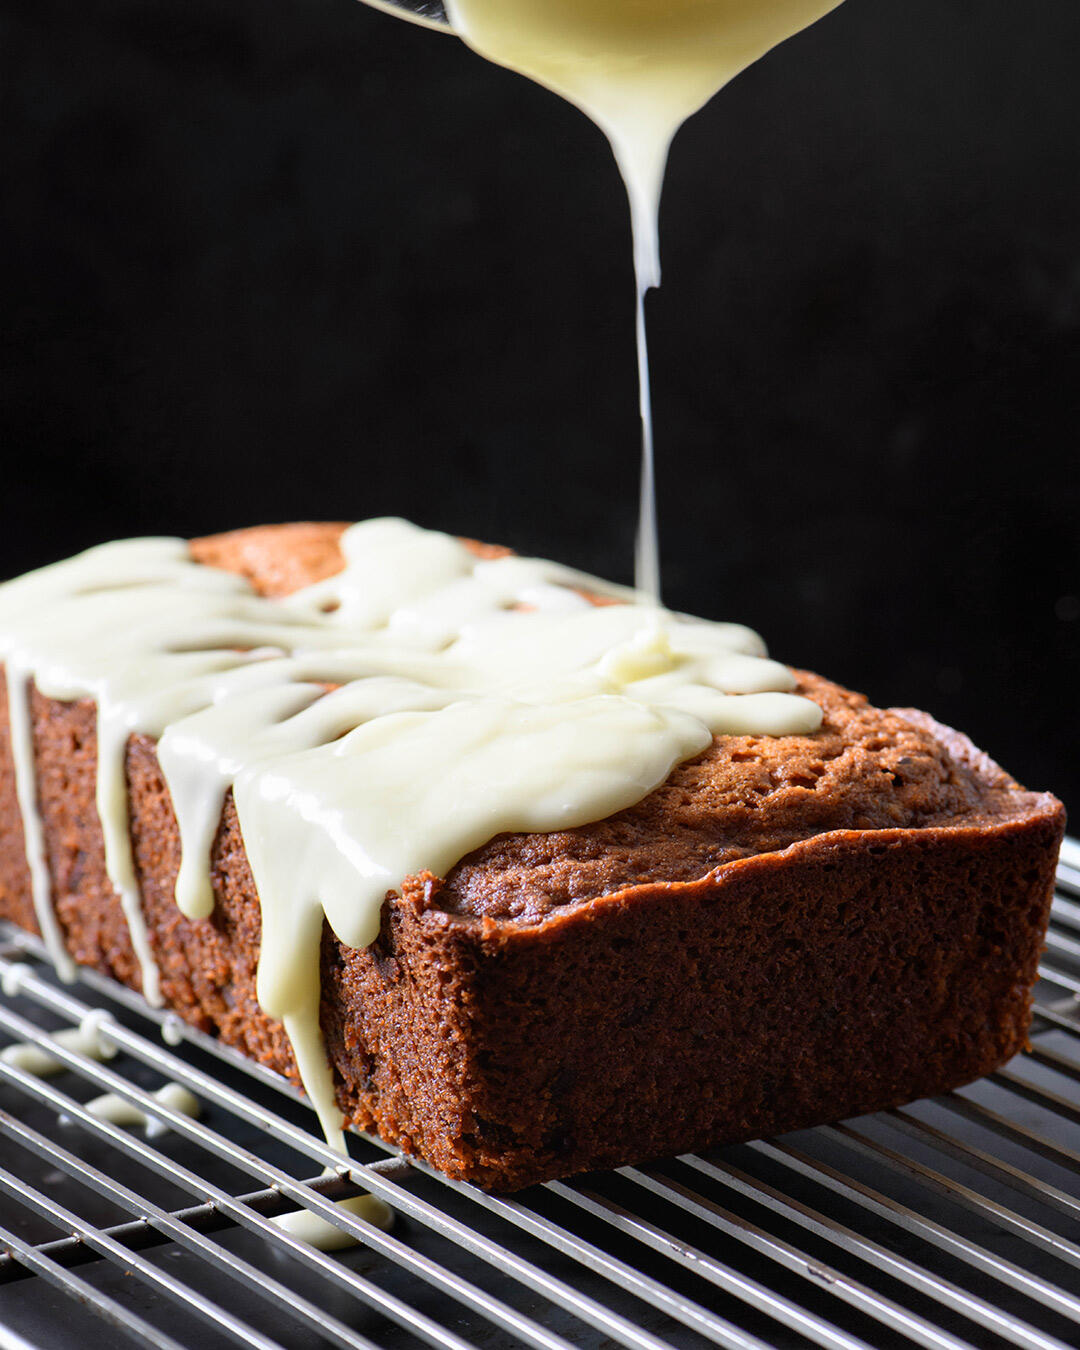
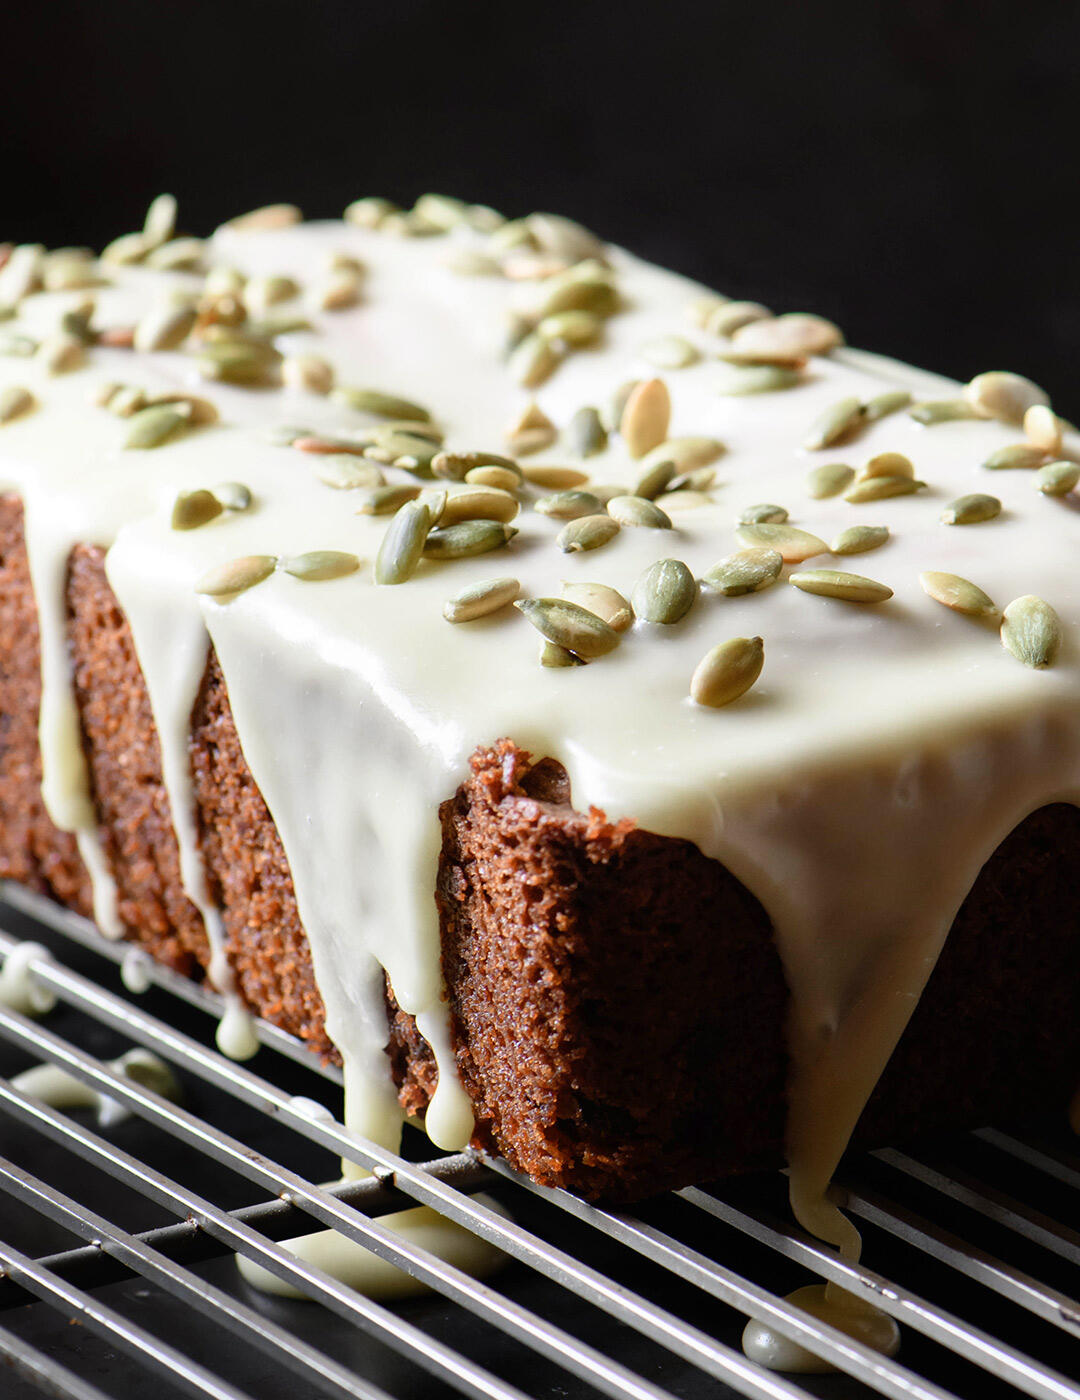
Glaze
As beautiful as the glazed loaf is, I would probably go with a light drizzle next time (similar to how I finished the mini bundt cakes). The glaze is definitely an important flavor element, but I found myself knocking chunks of it off when eating the slices. All of that being said, I'm not partial to the aesthetic of a drizzled loaf since Entenmann's lowfat raspberry twists haunt my teenage memories. Seems I haven't fully sorted my feelings on the glazing subject, but I would still suggest creatively using a touch less for the loaf. Using a disposable piping bag worked well or you could use a Ziploc bag with the corner snipped off.
Original vs. Adapted
Chocolate
I reduced the chocolate from 8 ounces to 5 ounces on my first bake and then used 4 1/2 ounces for the second bake. If memory serves, my slices look and taste very similar to the kabocha cake that I've purchased at GTA and Gjusta so 8 ounces is a bit of a head scratcher. My humble opinion is that 5-ish ounces of chocolate is plenty as can be seen in the bottom photo. Also, I start with about 1/4-1/2 ounce more chocolate than actually ends up in the recipe if I'm using a bar. After chopping, there are very fine shards that I prefer not to use since they distribute the chocolate flavor too much throughout the crumb. I like to let the kabocha flavor stand apart from the chocolate...I also like to overthink things. Chef's discretion.
Cacao Nibs
I didn't add cacao nibs since they weren't in my pantry. The ingredient is included below in the event that you want to add the extra layer.
Roasted Kabocha Squash - Jimenez Family Farm
Farmers | Artisans
I make an effort to source my food from California artisans with a special focus on the Santa Monica Farmers Market. Below is a list of the folks who contributed to this dish.
- Jimenez Family Farm and The Garden Of...// Kabocha Squash
- Trattore Farms // Home Chef's Blend Olive Oil
- Central Milling // Organic Beehive All-Purpose Flour
Tools
- Scale // A scale is your best baking (and cooking) friend forever. I recently added this baby scale to the mix since it measures in .1 gram increments. It's useful for salt, herbs, baking powder, coffee grounds, and more.
- Thermapen Digital Thermometer // I use my Mk4 daily for coffee, sourdough, meat, quick breads, and such since it's fast, accurate, and a snap to clean.
- Bowl with Silicone Bottom // The no-slip bottom of this bowl makes it very easy to pour and mix at the same time.
- Whisk
- 9x5 Loaf Pan, Mini Cake Pan (for the mini cakes pictured), or Mini Loaf Pan (or here)
- Baking Sheet
- Cooling Rack
- Large Measuring Cup
Ingredients (Recipe from the Gjelina cookbook. Makes 1 9x5 loaf , or 12 mini cakes + 1 mini loaf.)
Cake
- 1 1/2 cups (180 grams) all-purpose flour
- 1 1/2 teaspoons baking powder
- 1/2 teaspoon baking soda
- 1 tablespoon ground cinnamon
- 2 teaspoons (1.4 grams) freshly ground nutmeg Note: Nutmeg is a strong spice. I don't pack the teaspoons even though it's a bit fluffy when freshly grated.
- 3/4 teaspoon (4 grams) flake-style salt Note: I used coarse Morton's kosher for this recipe.
- One 1-pound (455 grams) piece of kabocha squash, skin on but seeds removed, measured after prep Note: I used a roughly 2 1/3-pound squash which is enough for two loaves after being cut in half and seeded.
- 1 cup plus 1 tablespoon (226 grams/255 milliliters) quality olive oil
- 1 1/3 cups (265 grams) granulated sugar
- 3 eggs (150 grams out of shell), room temperature
- 5 ounces (157 grams) 70% Valrhona bittersweet chocolate bar, chopped into small bits. Note: See chocolate notes under "Recipe Tips" and "Original vs. Adapted".
Toppings
- 3 tablespoons pepitas (raw hulled pumpkin seeds)
- 2 tablespoons crushed cacao nibs Note: I didn't use these but the recipe calls for them to be sprinkled on top.
Olive Oil Glaze
- 1 1/3 cups (150 grams) powdered sugar
- 2 tablespoons hot filtered water, plus more as needed
- 3 tablespoons extra-virgin olive oil
Instructions
Roasting
- Move oven rack to the middle position and pre-heat to 420°F.
- Line a baking sheet with foil and then lay a piece of parchment paper on top of that.
- Rub the skin and flesh of the squash with olive oil, place the cut-side down on the baking sheet, and roast for 40-50 minutes until very tender. Note: If you have squash wedges, gently flip the squash onto the other cut edge about 30 minutes in. Roast for 10-20 minutes more or until tender. The squash and shell will be quite soft.
- Once the squash is cool enough to handle, gently scrape the flesh away from the skin. Note: If there are lumps, mash the squash thoroughly with the back of a fork. If there are still lumps, purée the squash in a mini processor. I've had to do the former but not the latter.
- Reduce the moisture in the squash:
- Lay 3 paper towels on the counter then spread your purée out on the paper towels so it's about an inch thick.
- Cover with 3 more paper towels and pat until soaked.
- Lift the top paper towels and utilize the dry parts, continuing to gently pat the squash.
- Once the top paper towels are soaked, discard.
- Lift one side of the bottom paper towels, fold the purée in half (it should peel off on its own), then move it to a new set of paper towels.
- Repeat once or twice until you have 5 1/4 ounces of roasted kabocha.
- This is the point at which you can stop and refrigerate the squash in an airtight container for 2-3 days. Be sure to bring the kabocha up to room temperature when you're ready to bake the cake(s).
Baking
- Move an oven rack to the middle position and pre-heat to 325°F.
- Sift the flour, baking powder, baking soda, cinnamon, nutmeg, and salt into a large bowl. Some cinnamon and salt might stick in the strainer so flip it over and give the strainer a few raps on the bowl to dump everything out. Note: It's helpful to use a bowl with a silicone bottom for hand-mixed batters since it keeps them from sliding around.
- Combine the drained squash, olive oil, and sugar in a medium bowl or large measuring cup (the latter being easier to pour with) and whisk until the sugar starts to dissolve.
- Whisk the eggs lightly to break them up, add them to the squash mixture, then whisk just enough to combine.
- Pour the olive oil mixture into the dry ingredients. If you whisk and pour simultaneously, the batter will just about come together when the wet ingredients have all been added.
- Add the chocolate, then scrape the sides and bottom of the bowl to both finish combing the wet/dry ingredients and incorporate the chocolate. As mentioned under "Recipe Tips", the goal is to avoid overmixing. Note: In terms of consistency, the batter will plop off of the spatula but it won't drizzle.
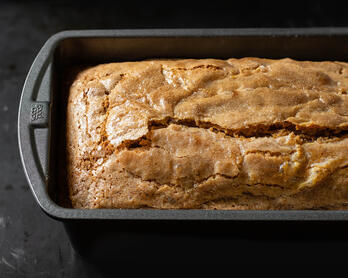
- Butter a 9x5 pan then line the bottom with parchment paper that has been cut to fit.
- Pour the batter into the pan, smooth the top, then place on the middle rack and bake for 75 to 90 minutes until the internal temperature measures about
210 °F.- After the first 35 minutes, rotate the pan 180 degrees. The edges will be starting to set but the center will still be somewhat concave and very jiggly.
- After 60 minutes, the cake will be full risen but the center will still jiggle if you move the pan. My cake took 75 minutes to fully bake.
- Run a paring knife around the edge of the cake, then place the pan on a wire rack and let it cool for 20 minutes. Note: This cooling step is not needed for the mini cakes and loaves.
- Run a paring knife around the edge again, invert the cake, remove and discard the parchment, and then let the cake cool on the wire rack.
- Mini cakes take about 25 minutes to bake.
- Mini loaves take about 40 minutes to bake.
Pepitas
While the cake is cooling, toast the pepitas in a small nonstick skillet over medium heat. Once they are fragrant, set aside to cool.
Glaze
- Combine the powdered sugar with 2 tablespoons of very hot water. Add more water or sugar so that the mixture has the texture of honey.
- Slowly drizzle in the olive oil, whisking constantly.
- Pour or pipe the glaze over the cooled cake. See "Recipe Tips" above.
- Sprinkle the toasted pepitas (and nibs if using) on the wet glaze.
- Allow the glaze to set and then enjoy!
Storage
The cake(s) can be wrapped in plastic and stored at room temperature for 3-5 days. The glaze is surprisingly sturdy.