Sourdough Sicilian Pizza
RECIPE UPDATED 1/10/25
Newsletter
Subscribe at the bottom of this page for the Chic Eats roundup. It includes new and updated recipes along with a grab bag of unique content that was interesting enough to share around the dinner table.
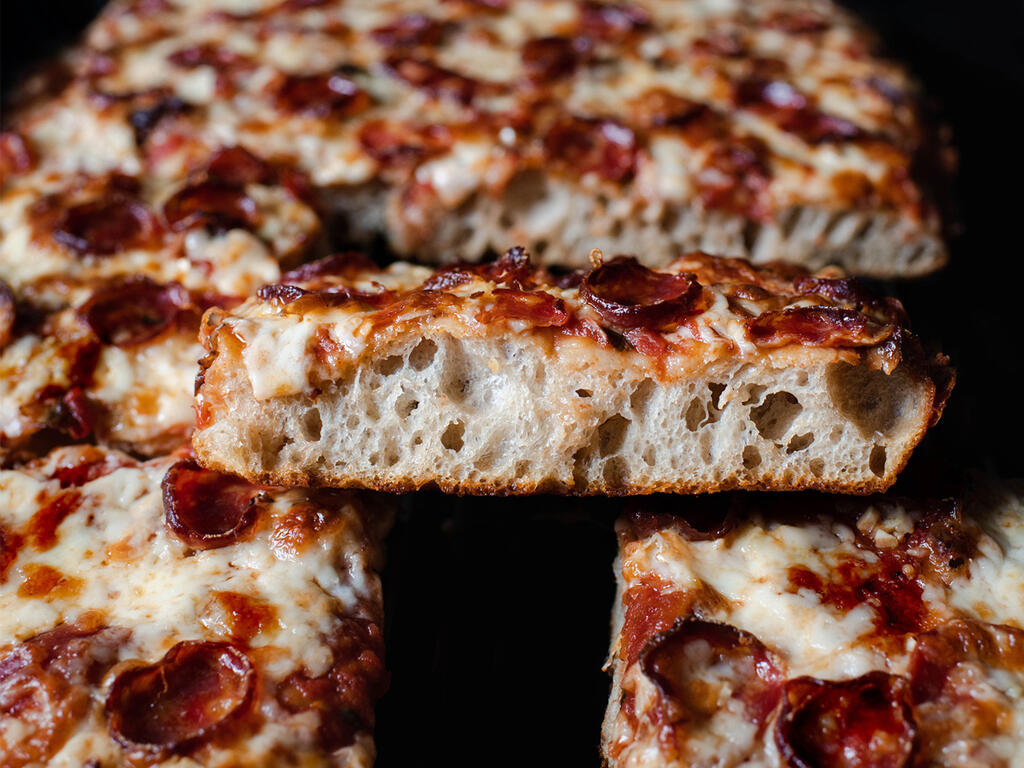
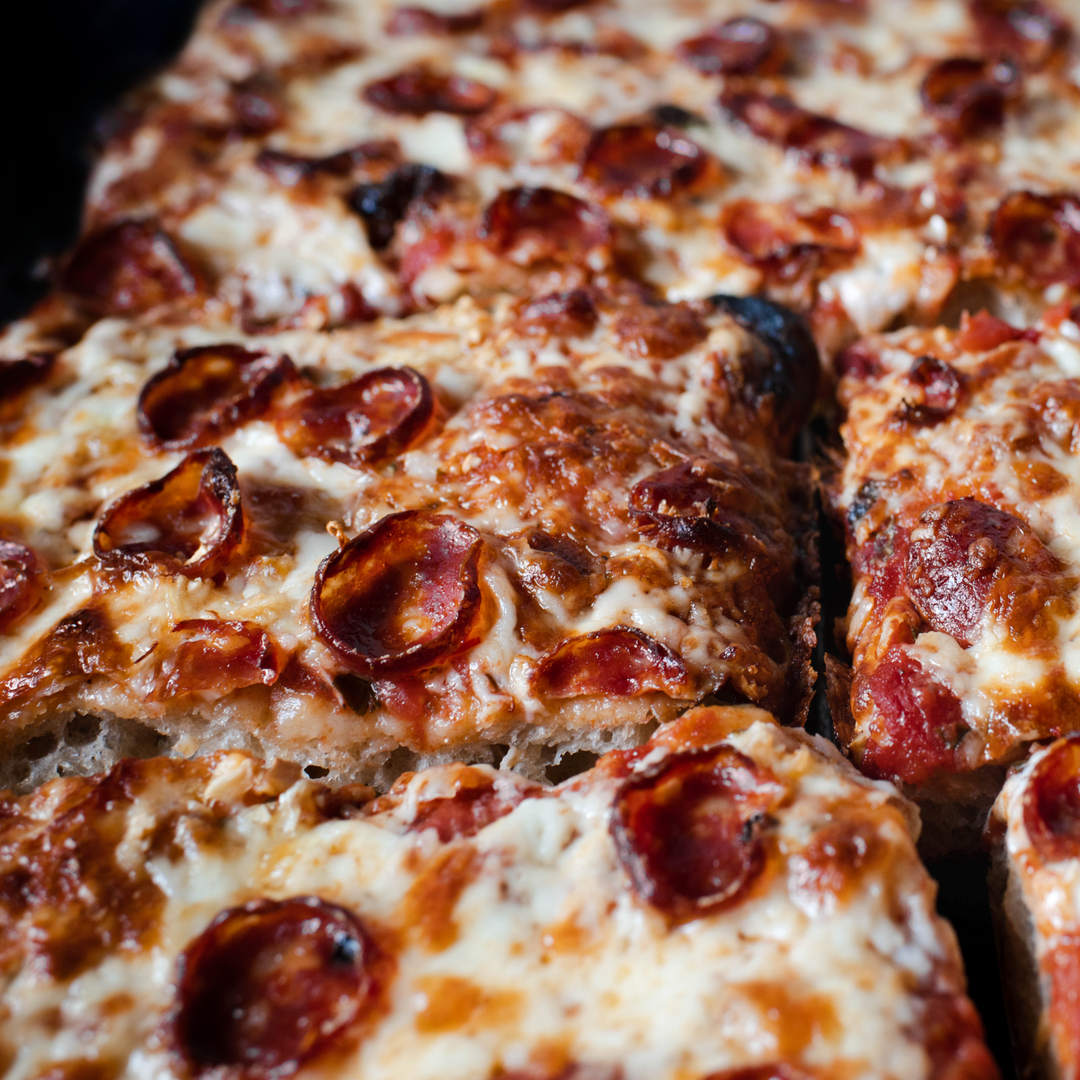
Sourdough Sicilian Pizza
This Sourdough Sicilian Pizza began as a birthday dinner and evolved into a quest for excellence. I wanted to make thick-cut pizza as good as anything I could fly across the country for. After gently tinkering with a recipe from Perfect Pan Pizza, I'm pleased to say the pictured New York-style Sicilian meets expectations and has become a Friday tradition.
My ideal Sicilian pizza has a buttery and deeply golden crust, springy crumb, absolutely no soggy bits, and a punchy herby sauce. After several iterations, I've managed to check all of these qualities off the list. You can make this recipe using a hybrid leaven (sourdough starter plus commercial yeast) or with just sourdough starter. I prefer the flavor of naturally-leavened dough but commercial yeast is a solid insurance policy since it gives the dough an extra boost. Included are notes for both approaches.
Original vs. Adapted
Take It Easy
I tried the strengthening routine in Perfect Pan Pizza and found that the dough was tricky to handle. After experimenting with a couple of methods, I ultimately settled on spreading the day 1 strengthening out over a longer period of time than the book suggests. It's a similar routine to strengthening a country sourdough loaf. The upside of this method is you can skip the mixer entirely in favor of your two hands and a bowl.
Commercial Yeast
The original Sicilian recipe in Perfect Pan Pizza includes 1 teaspoon (0.11 ounces / 3 grams) of instant yeast along with the sourdough starter. As mentioned in the intro, I included commercial yeast the first time I made the pizza since it boosts activity and adds some stability. After a successful initial bake, I dropped the commercial yeast and found the flavor of 100% naturally-leavened dough was preferable. If you choose to use commercial yeast, the final proofing will be reduced by about half depending on your environment (1 1/2 hours instead of approximately 3).
How Many Days?
From pizza to Sycamore Kitchen's Cookies, dough performs and tastes better when you give it time. With that said, most of the process leading up to the final bake doesn't require much active work. Day 1 strengthening is a handful of stretch/folds and day 2 is a 5-minute step.
Full disclosure is that I've baked the pizza off on day 2 and it was still excellent. The dough is tighter so you have to take care not to overwork it during the dimpling steps or it can stick to the pan. Other than that, if you're pressed for time you can cut the process short and still have great results. You should not deflate or stretch/fold the dough on day 2 if you plan to try the shorter time frame.
Feeling Stuck
Expanding the above note, on one occasion the baked pizza partially stuck to the pan but ultimately came free with some coaxing. The dough was a bit tight that day so my hunch is that I overworked it during the dimpling steps which created some sort of issue with the oiled pan. Maybe the dough absorbed the olive oil? All the movement/dimpling pushed the oil away from the center? The moral of this uncertain tale is to give the dough extra resting time if it's fighting you.
Dough Quantity
Perfect Pan Pizza suggests scaling this dough recipe back by 114 grams/4 ounces when making Sicilian-style pizza. I skip that step and use the full amount of dough so my crumb has a little more loft than the cookbook intended. There aren't any hard and fast rules with these things.
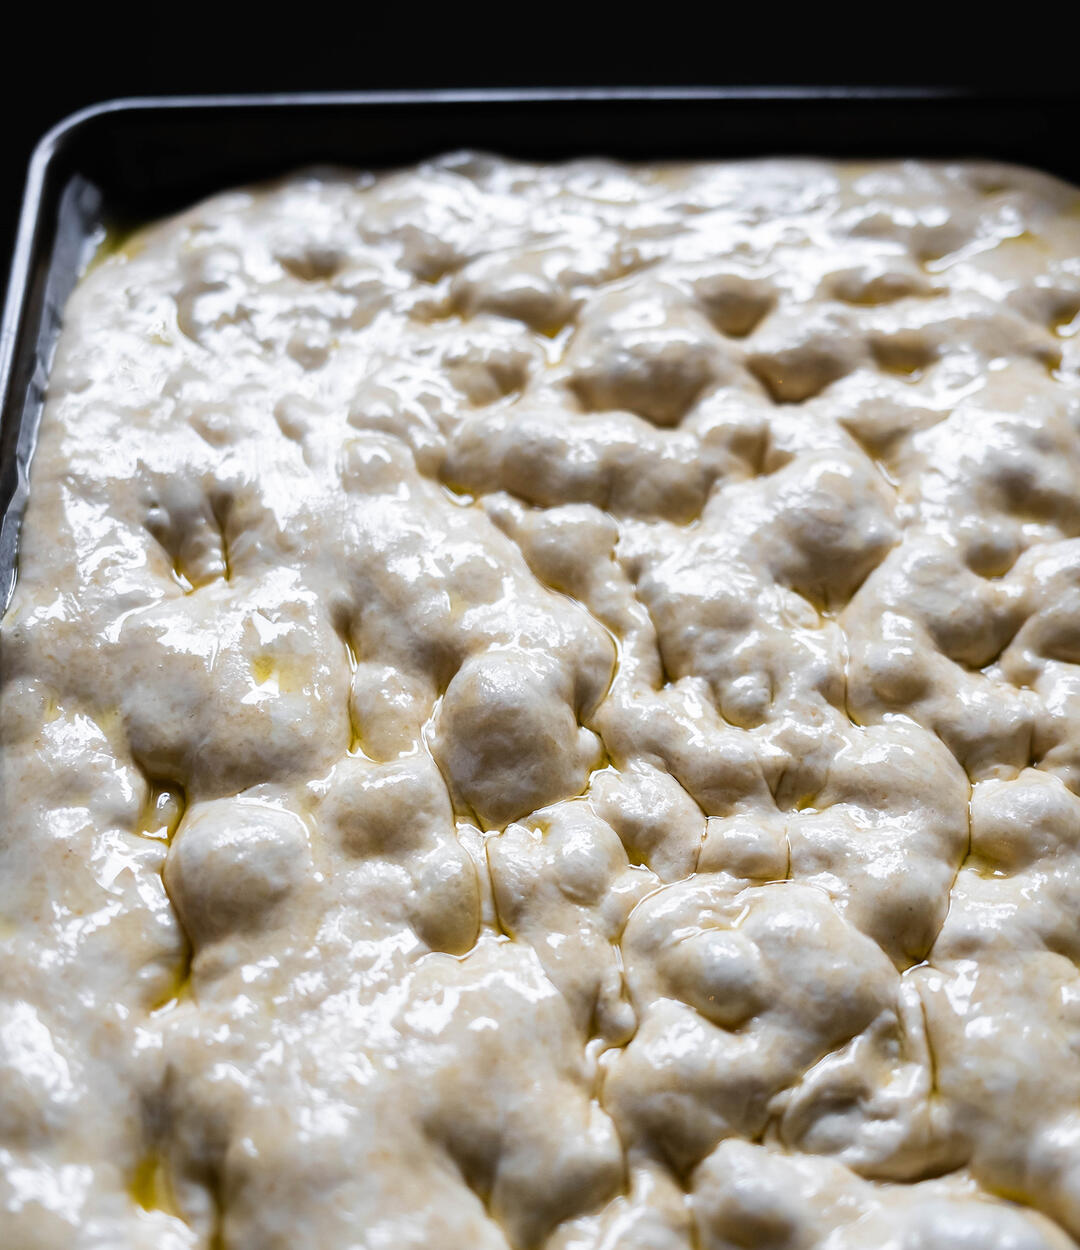
Final Dimple - Sourdough Sicilian Pizza
Recipe Tips
The Art of Dimpling
Also known as the most fun part of making a pan pizza. Once the dough is in the pan, it takes 60 minutes (in 20-minute increments) to dimple the dough into the right shape and size. There are a number of focaccia videos online that show the cook pulling or stretching the dough as well as dimpling it. My instinct is to avoid tugging or pulling once the dough is in the pan since the texture is easy to work with. Extended notes under Instructions and a brief glamour video I made here.
Flour Types
- Regular bread flour can be substituted for Central Milling's ABC Plus and High Mountain though I highly recommend CM's products.
- In terms of whole grain, I've used Camas Country Bread Blend, Camas Country Edison, Grist & Toll Hard White, and Grist & Toll Red Fife. The latter is delicious but lower in protein so I probably wouldn't recommend that flour right out of the gate. Generally speaking, protein = strength = structure.
Sourdough Starter Hydration
I maintain my sourdough starter at 85% hydration so that's what I call for in this recipe. Even if you normally maintain a 100% hydration starter (1:1 ratio of flour and water), it's easy to build your leaven with the correct hydration in as little as one feeding and those instructions are below.
"Shear" Genius
I've tried cutting my Sicilian with a pizza wheel, carbon-steel knife, and cooking shears. Shears are consistently the best way to preserve the integrity of your pizza's structure and toppings - credit and thanks to King Arthur for that tip. I would rather use the ubiquitous orange-handle scissors than a pizza wheel (I've done it in a pinch with a relatively new and sharp pair). Shun's cooking shears have been in my kitchen for years and are excellent. One note on this (repeated under Instructions) is that the pizza has to cool down for at least 10 minutes before you try to cut it with cooking sheers. If it's too hot things can get a bit messy and unruly.
Barley Malt Syrup
I recommend picking up a jar of barley malt syrup if you plan to make pizza or bagels more than once. Barley malt syrup has a long shelf life and can be added to other baked goods such as rolls, bread, and cookies. Honey works as a substitute but lacks that something special.
Parchment Paper
The cookbook suggests lining the entire pan with parchment cut to lay perfectly flat. Over the course of several pizzas, I cut the parchment smaller and smaller until I eventually ditched it completely. I trust my oven and pan at this point and know how far the crust can be pushed. With that said, I believe parchment is helpful when first making this pizza since different ovens and pans may cook the bottom differently. With or without parchment, I've always enjoyed my Sicilian pizza (though none of them ever burned...so there's that). If you find the bottom isn't quite as golden as you would prefer after the pizza is finished baking, placing the slices on a pizza stone for a minute or two will crisp things up nicely. Another option is to reheat the slice(s) on a baking sheet. Additional notes under Instructions.
Winter is Coming
I've made this pizza on both coasts and found the final day 3 proof needed more time in colder weather. Keep that in mind if there isn't a warm room in the house. Turning the light on in the oven can also work as a cozy proofing box, just make sure it doesn't get too warm.
Mise en Place
From topping the hot par-baked crust to transferring the finished (also surface of the sun) pizza to the cooling rack, it pays to be prepared. I prep all of my ingredients (other than the chopped herbs), put them in the refrigerator, and then set out my tools. Don't go scampering off in search of this or that when there's a 500°F pan to deal with.
Leftovers
The leftovers are just about as good as the day-of pizza so don't be shy about making this for a party of two or cutting the recipe in half and making it for a party of one. I use a 10x10x1.5 Lloyd pan for half portions. Reheating instructions at the end.
Farmers | Artisans
I make an effort to source my food from California artisans with a special focus on the Santa Monica Farmers Market. Below is a list of the folks who contributed to this dish.
- Coleman Family Farms / Herbs
- Schaner Family Farms / Garlic
- Central Milling / Bread Flour
- Camas Country Mill / Whole Grain Flour
- Grist & Toll / Whole Grain Flour
- Katz Farm / Olive Oil
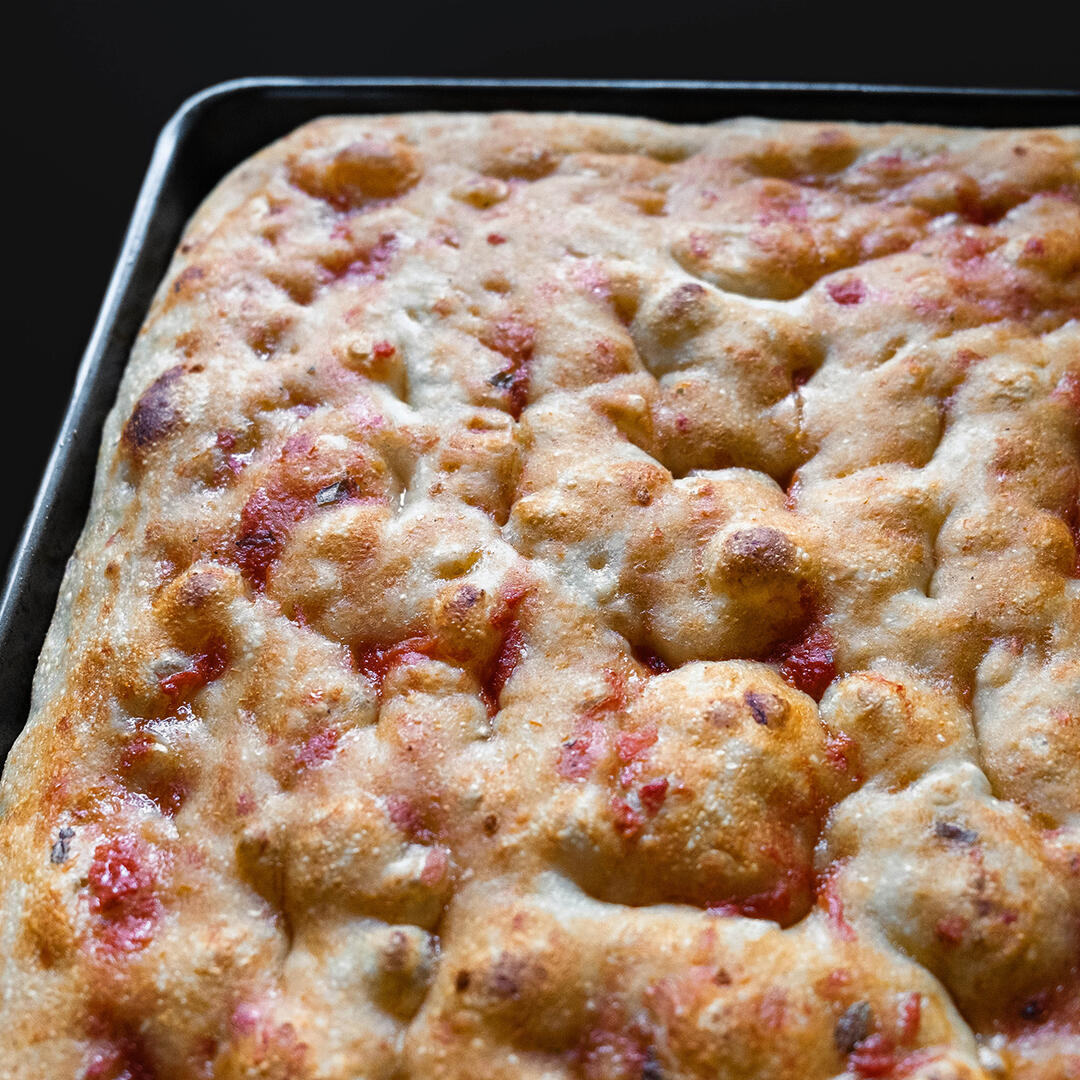
Par-Baked Sourdough Sicilian Pizza
Tools
- Mini Measuring Cup - I’ve purchased five of these little guys for home and the Airstream. They’re handy for everything from the ubiquitous "2 tablespoons of olive oil in the pan" to Scratch Margaritas.
17" x 12.25" Chicago Baking Pan12x18x1.5 Lloyd Pan - For many years I used a dark grey Chicago jelly roll pan for this pizza but switched to Lloyd a couple of years ago. The airiness of the crumb, crust development, and ease of cleaning are all exceptional. 10x10x1.5 is what you want if you prefer to make a half portion of the pizza.- Shun Cooking Shears - These shears were part of a knife set that I received over 10 years ago. Lucky for me that they work great and also happen to be highly rated. The handle has a helpful texture and the blades come apart for easy cleaning. An essential tool for Sicilian Pizza.
- OXO Pizza Wheel - I've found this to be the most effective tool for quickly separating the pizza's edge from the pan. A pizza wheel is also great for cutting the edge of pie/galette dough.
- Cooling Rack - Though I have both wire and mesh cooling racks, I'm partial to the wired since there are less nooks and crannies to clean.
- Sturdy Spatula - I've had the same metal spatula for as long as I've been cooking and have no idea how it ended up in my kitchen. The key with whatever spatula you use is that it's sturdy (some are thinner and meant for delicate food like fish). If I ever buy my spatula a sibling, it will likely be the one that's linked.
- Silicone Gloves - I have multiple pairs of these and they work well for everything from pizza to Sourdough Bread. Fabric gloves don't cut it with a 500°F pan.
Ingredients (Adapted from Perfect Pan Pizza)
Note: The % listed at the end of each line is the baker's percentage for folks out there who may want it. There's no need to worry about those numbers otherwise.
85% Hydration Feeding
- 60 grams mature starter || 50% inoculation
- 100 grams room temperature (70-74°F) filtered water || 85% hydration
- 57 grams Grist & Toll Sonora (or whole wheat of choice)
- 60 grams Central Milling Organic Beehive (or unbleached all-purpose)
Pizza Dough
- TOTAL FLOUR: 510 grams || 100%
- 50 grams Central Milling High Mountain || 9.8%
- 76 grams whole grain of choice (See Flour Types) || 15%
- 384 grams Central Milling ABC Plus || 75.2%
- 420 grams filtered water || 82% Note: This assumes the starter has been built with a hydration of 85% - those ratios/instructions below. If you prefer to use a 100% hydration starter, reduce the water to 405 grams.
- 170 grams mature 85% hydration levain/leaven || 33%
- 10 grams (approximately 2 teaspoons) barley malt syrup or honey (See Recipe Tips) || 2%
- 13 grams fine sea salt || 2.5%
- (Optional) 3 grams/0.11 ounces (1 teaspoon) instant yeast || 0.60%
- 28 grams (2 tablespoons) quality olive oil || 5.5%
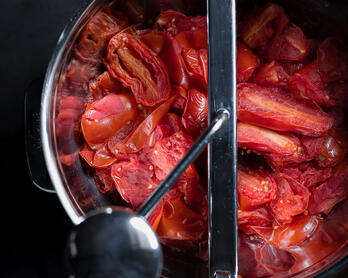
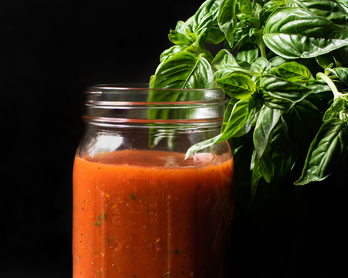
Toppings
- 340 grams (12 ounces) Pizza Sauce
- 17-20 grams minced or thinly sliced garlic, divided
- 1 tablespoon chopped fresh oregano
- 100 grams (3 1/2 ounces) freshly grated provolone or caciocavallo, divided
- 300 grams (10 1/2 ounces) freshly grated low moisture mozzarella, divided
- 113 grams (4 ounces) thinly sliced pepperoni, divided
- Maldon sea salt
- Freshly ground black pepper
- Freshly grated Parmigiano Reggiano
(Optional) Sourdough Starter Maintenance/Build
Note: The following is my feeding schedule leading up to the day 1 mix. You don't have to follow this if you're happy with your routine and already have a vibrant sourdough starter.
Starter Creation and Maintenance
My post "How to Build and Maintain a Sourdough Starter" covers this topic. You should have a healthy starter that is being fed twice a day, preferably at the same time of day. If you feed once every 24 hours and your starter is vibrant, give the recipe a go. A secondary post on Dave Miller's Starter Maintenance can be found here and is great for people who bake infrequently or want long-term storage with less feedings.
11:00 a.m. - Feeding (Sometimes performed in the early afternoon depending on my schedule so there's flexibility.)
Combine the following ingredients, mix thoroughly, and place in a warm area (preferably 73-76°F). I stir the mixture down about halfway through the feeding/doubling process.
- 20 grams mature starter || 50% inoculation
- 34 grams room temperature (70-74°F) filtered water || 85% hydration
- 20 grams Grist & Toll Sonora (or whole wheat of choice)
- 20 grams Central Milling Organic Beehive (or unbleached all-purpose)
11:00 p.m. - Feeding
Combine the following ingredients, mix thoroughly, and place in a warm area (preferably 73-76°F). If I remember, I stir the mixture once more before going to sleep.
- 15 grams mature starter || 15% inoculation
- 85 grams room temperature (70-74°F) filtered water || 85% hydration
- 60 grams Grist & Toll Sonora (or whole wheat of choice)
- 40 grams Central Milling Organic Beehive (or unbleached all-purpose)
Day 1 - 85% Hydration Feeding, Mix, Strengthen
12:00 p.m. - Feeding
Combine the following ingredients, mix thoroughly, and place in a warm area (preferably 73-76°F). I stir the mixture down about halfway through the feeding/doubling process.
- 60 grams mature starter || 50% inoculation
- 100 grams room temperature (70-74°F) filtered water || 85% hydration
- 57 grams Grist & Toll Sonora (or whole wheat of choice)
- 60 grams Central Milling Organic Beehive (or unbleached all-purpose)
Mix
- Once the leaven/sourdough starter has matured (doubled or reached the float stage), proceed with the mix.
- Measure out 28 grams (2 tablespoons) of olive oil and set aside.
- In a large bowl, combine 420 grams filtered room temperature water, 170 grams of 85% hydration sourdough starter, and 10 grams barley malt syrup. Stir until the syrup and starter is dissolved. There may be some small starter bits floating around which is fine.
- In a separate bowl, whisk together the salt and flours (and instant yeast if using). Add the flour to the water mixture and squeeze, mix, and flip until combined. Once combined, add the 2 tablespoons of olive oil and squeeze, mix, and flip some more. The dough will have some shiny spots so keep mixing until those are incorporated. The process takes about 1-2 minutes.
- Once you're done mixing, the dough will be sloppy and sticky which is exactly what you want. Continuing with your Franken-hand, reach under the dough, grab a handful, then pull up and just flop it down. It's not like a normal stretch/fold (if you're a bread baker) since there isn't enough strength yet. Spin the bowl a quarter turn and scoop/flop again. Repeat five revolutions (20 stretches). That was stretch/fold #1.
- Scrape down your hand and the sides of the bowl, cover with a reusable shower cap or similar, and set a timer for 30 minutes.
Strengthen
Note: Always lightly dampen your hands when strengthening sticky dough.
- Reach a damp hand under the dough, grab a quarter of it, then stretch up and over. Do this on all four sides then repeat (a total of 8 stretches). The dough will already be showing signs of strength or structure at this point. Stretch/fold #2 is complete. Set a timer for 30 minutes.
- Repeat the stretch/fold but only perform one revolution (a total of 4 stretches). Stretch/fold #3 is complete. Set a timer for 30 minutes.
- Repeat the stretch/fold (a total of 4 stretches). Stretch/fold #4 is complete. Set a timer for 30 minutes. Note: If the bowl is a little crusty and starts grabbing/tearing the dough during the stretch/folds, this is the point when I transfer the dough to a clean bowl.
- Repeat the stretch/fold (a total of 4 stretches). Stretch/fold #5 is complete. Flip the dough over and gently life and tuck the dough under to smooth and round the dough before it goes to sleep in the refrigerator. You can also do this on the counter with a bench scraper like a bread pre-shape if that's more comfortable. Cover the bowl with a reusable shower cap or similar and refrigerate.
Day 2 - Check In
- Remove the bowl from the refrigerator and observe the activity. Normally the dough will be slightly puffed but otherwise just needs more time and can be left alone. Put it back in the refrigerator and carry on until tomorrow. On the other hand...If the weather is especially hot or your refrigerator doesn't maintain a consistent temperature, you may find that the dough is quite inflated and may even have large bubbles. I've run into this issue a couple of times. Continue to the next steps if that's the case.
- With damp hands, lightly press down on the dough to deflate it. Note: As I understand it, extended periods of excessive gas aren't good for gluten development and the overall integrity of the dough. Also, an overinflated dough won't have a desirable structure when it's time to dimple and bake.
- Perform a gentle stretch/fold - pull one quarter up and over and then repeat on the other three sides. Flip the dough over so it's seam-side down, then lift and tuck the dough onto itself once or twice just to smooth out the top. Cover and refrigerate.
Day 3 - Dimple & Bake
Note: Keep in mind that the proofing time is reduced by about half if you include instant yeast - approximately 1 1/2 hours instead of 3 depending on ambient temperature. The timeline below is just an example and is for naturally-leavened dough (no instant yeast). The elasticity of the dough can vary from batch to batch so your dimpling may go a little slower or faster based on your dough's mood. The goal is to always be patient. I've found that when I "overwork" the dimpling the dough ends up sticking slightly to the pan. If the dough is fighting you or snapping back, let it rest.
3:15 p.m. (approximately) - Dimpling - There's a brief video that I made here.
Dimple 1
- Take the dough out of the refrigerator and set aside.
- Optional: If using parchment paper (see Recipe Tips), cut a piece to fit the pan leaving a 1-inch gap around the edge. Place it on the pan.
- Drizzle 4 tablespoons of olive oil on the pan (pour it on top of the parchment paper if using) and then use your fingers to spread it around evenly.
- Rub your hands together so both are oiled, then work your fingers around the edge of the dough to ensure it isn't sticking. Using both hands, scoop underneath the dough, lift the dough out, and then place it on the pan taking care not to let the mass double over on itself. The dough will be an oval so orient it lengthwise in the pan.
- Drizzle 1-2 teaspoons of olive oil in your hand, rub your hands together, then gently pat the dough so it glistens. Using the tips of your fingers, dimple the dough so that it begins to stretch out into the shape of the pan. The dough may have some large bubbles - if they're larger than about an inch, just dimple those down. The rest will get worked into the dough throughout the next hour.
- You'll develop your own style for dimpling but here's my process for reference. This is not an exact science and the dough is always a touch tight right out of the refrigerator and may be particularly elastic (i.e. it snaps or springs back after being dimpled).
- Position the pan so that the short side is in front of your body.
- Starting at the center, spread your fingers and dimple towards your body a few times. Return to the center and dimple a few times away from your body.
- Spin the pan so the long side is in front of your body. Starting at the center, spread your fingers and dimple a few times towards your body, then return to center and dimple a few times away from your body.
- Return to center and dimple towards the corners. Then, dimple the dough that's up against the sides of the pans towards the corners of the respective side.
- Set a timer for 20 minutes.
Dimple 2
- Oil your hands and perform another set of dimpling.
- The dough should still be glistening. Pat it lightly with a little more olive oil if needed.
- Set a timer for 20 minutes.
Dimple 3
- Gently feel around the dough and you will notice uneven or thicker areas. Focus on evening those sections out by dimpling towards a corner or side that needs to be filled in. I usually find the center and/or long edges need attention.
- Set a timer for 20 minutes.
Dimple 4
- Similar to the 3rd round of dimpling, focus on fixing any uneven spots by dimpling towards a corner or side that needs to be filled in.
- Slide the pan into a proofing bag or cover by some other means. Try to avoid having any plastic touch the surface.
- Set a timer for an hour.
Note: Including some redundant information here in the event that it was missed. If you used instant yeast, your proofing time will be reduced by about half so adjust accordingly.
5:30 p.m. - Dough Check
- After an hour, I assess how the dough is progressing and sometimes move it to a warmer room for the last hour and a half to give it a pop of energy. The dough is ready when it's about 1/2-inch from the top of my baking sheet and the bubbles look almost transparent (see photo above). I don't have a better way to describe it, but you'll notice when the dough transitions. The ambient temperature in my house is 72-77°F and from the time the dough comes out of the refrigerator to the par-bake is about 3 hours. As mentioned earlier in the post, that time will be cut in half if you're using a hybrid leaven (commercial yeast plus sourdough starter).
6:15 p.m - Go Time
- Move the oven rack to the middle position and heat to 500°F. Place a pizza stone on the lowest rack or, if possible, on the bottom of the oven (I prefer the latter option). No worries if you don't have a pizza stone, there's an alternative below.
- While the oven is pre-heating, set up your pizza station. Hot pans and pizza wait for no one. Situate all of your tools, pull the ingredients out of the refrigerator, chill the wine (if applicable), and get psyched. Here's a checklist:
- Olive Oil
- Maldon Sea Salt
- Pizza Sauce
- Cheese (divided)
- Pepperoni (divided)
- Garlic (divided - keep it securely covered since garlic can oxidize)
- Fresh Oregano, chopped
- Black Pepper
- Parmigiano Reggiano
- Pastry Brush
- Heat-proof Stand for Pan
- Silicone Gloves
- Cooling Rack (large enough for entire pizza)
- Pizza Wheel
- Cooking Shears
- Sturdy Spatula/Turner
- Cheese Grater
6:45 p.m. - Par-Bake
- Once the oven is pre-heated, use oiled fingers to dimple the dough one more time making sure to avoid the 2" edge. Don't dimple repeatedly in the same place - press, lift, and move to a different spot. See photo above for what my dough looks like after the final dimpling.
- Dip the pastry brush in the sauce and gently dab/barely brush the dough, repeating until the entire surface has a light coating. Sprinkle with freshly ground pepper and a pinch of crumbled Maldon sea salt. Note: I use about 1/4 cup of sauce (mostly sauce - not as many tomato pieces) for this step. Also, I have savory and sweet pastry brushes. I've found that using silicone pastry brushes aren't great for sweet applications once they've come into contact with acidic food like pizza sauce.
- Bake for 10 to 12 minutes, rotating halfway through - the tops of some of the larger bubbles will brown (see photo above). Update: Those original instructions worked well in my old oven with the jelly roll pan and they may be fine for you. That said, since changing ovens and switching to Lloyd, I've adjusted my timing to ensure the bottom doesn't get too dark. My new approach is to bake for 8 minutes during this step. I realize it may seem like splitting hairs—10 to 12 minutes vs. 8—but at 500°F those few minutes can make a big difference.
- Tidy up your pizza station.
Toppings
- Remove the pan from the oven and place it on something heat-safe and sturdy .
- Scoop a bit of sauce around the edge and then use a pastry brush to spread it around. Brush the sauce towards the center but don't allow it to pool anywhere. Continue scooping and brushing the rest of the sauce - it takes a minute or two to get an even coat.
- Add the fresh oregano and half of the garlic.
- Add half of the cheese blend.
- Add half of the pepperoni.
- Add the rest of the cheese followed by the remaining garlic and pepperoni.
- Promptly return the pan to the oven and bake for 12-14 minutes, rotating the pan halfway through. The cheese will develop some brown spots and the pepperoni will be nicely crisped around the edge. minutes, rotating halfway through. Update: Those original instructions worked well in my old oven with the jelly roll pan and they may be fine for you. That said, since changing ovens and switching to Lloyd, I've adjusted my timing to ensure the bottom doesn't get too dark. My new approach is to bake for 8 minutes during this step, rotating halfway through. Then I switch to the broiler on high and move the pizza up to a higher rack for about 2 minutes to brown the top. Watch the pizza closely to avoid browning it too much.
Dismount
The next step can be tricky since it's performed right after the pizza comes out of the oven. In my experience, the crust steams and loses its snap when left in the pan to cool. Immediately removing the pizza from the pan preserves the crispness of the crust and prevents it from getting chewy. You'll get the hang of things after doing it once.
- Remove the pizza from the oven and place it on something heat-safe and sturdy.
- Put a silicone glove on one hand and use it to steady the pan. Take the pizza wheel in the other hand and scrape between the crust's edge and the pan, holding the wheel on a slight angle so as to separate the edge but not cut into the pizza. The crust should cleanly break away from the pan.
- Spin the pan a quarter turn and continue to do this on all four sides.
- Nudge your spatula under the pizza and then slide it all the way around the pan to make sure there aren't any sneaky bits still sticking - usually it's a corner which is easy to free up.
- Place the cooling rack right next to the hot pan. Hold the pan with your gloved hand, then slide the spatula underneath the pizza (you should not meet any resistance with all of that olive oil), gently tip the pan towards the wire rack, and then slide the pizza on to the rack using the spatula to guide and gently "pull". If you're nervous the first time you do this, have a spotter who can help you slow the pizza's roll if things move too quickly. I almost slid the pizza into the sink the first time I did this.
- If using parchment, promptly remove and discard if it hitched a ride.
- Grate some Parmigiano Reggianno on the hot pizza.
- I like to eat the pizza warm but not surface of the sun hot since that gives the flavors and cheese time to settle - about 10 minutes of resting. Once ready to serve, cut with cooking shears. Note: As mentioned in Recipe Tips, using scissors can be a bit unruly if the pizza is too hot when you cut it.
Crisp It Up
- Lower the oven temperature to 400°F if you plan to reheat slices throughout dinner. (Sometimes I just turn the oven off and use the residual heat.)
- If the bottom of your pizza didn't turn out as crispy as you would prefer, slick a piece of foil with olive oil, rub the slice(s) of pizza in the oil, then place on the stone and heat for 30 seconds to a minute. Watch the pizza closely as the bottom goes from golden to burned in a blink. Another option is to line a baking sheet with foil, slick it with oil, then proceed with crisping. This will take a little longer than the pizza stone.
- If the pizza is completely cool/cold, I use the baking sheet method mentioned in the last bullet to reheat the pizza and crisp the bottom.
Leftovers
- Refrigerate leftover slices in an airtight container for one to two days.
- To reheat, let the pizza sit at room temperature for 20 minutes or so before heating the oven. Move the oven rack to the middle position and heat to 400°F.
- Line a baking sheet with foil, slick the foil with olive oil, then slide the slices of pizza around to ensure the bottoms are coated. Bake for about 10 minutes until the cheese is melty. The bottoms should crisp up while the pizza is warming. Note: On a couple of occasions, the bottom of the pizza was getting too dark so I created foil "rails" (basically just wadded up strips of foil) to elevate the pizza off of the pan. It's a fussy step that isn't necessary 99% of the time.
Newsletter
Subscribe at the bottom of this page for the Chic Eats roundup. It includes new and updated recipes along with a grab bag of unique content that was interesting enough to share around the dinner table.
Shutterbug
If you make this recipe, feel free to post your photos in the comments.
Sourdough Sicilian Pizza