Dave Miller's Sourdough Starter Maintenance
RECIPE UPDATED 7/17/23
A while back, I had the privilege of attending Dave Miller's bread class at Grist & Toll and came away inspired. This post is focused on conversations the group had about Dave's starter maintenance.
Though I've spent a lot of my sourdough journey pondering the minutia from strengthening to pre-shaping, the key to making a great loaf of bread is ultimately the vitality of your food pet. Dave's routine got my brain wheels spinning about ways I could improve the health and performance of Moomin the Starter. My original instructions, "How to Build and Maintain a Sourdough Starter", are still on point so this post is simply an extension of that information.
Four Takeaways
After the class, I started playing with four concepts related to starter maintenance: a stiffer starter, stepped inoculations, consistent 2X a day feedings, and giving the yeast a rest.
Stiffened Starter
But first, a qualification. I've read a number of forums and blog posts regarding stiff vs. liquid starters and whether or not one imparts more of a "sour" taste, more strength, more spring, and so forth. Though I still don't have a clear understanding of the science, I assume there's a results-oriented difference between stiff and liquid since certain formulas specifically call for one over the other. There's a lot to consider with this subject if you go down The Google rabbit hole. I came across some threads on The Fresh Loaf (here and here) that are a bit mind-bending but interesting if you like information peppered with diagrams of molecules. For the purposes of this post, however, I'm going to leave the deep science out of it. My experiments discussed below stem more from advice from other bakers than my own knowledge about LAB, acetic acid, yeast, and the balances thereof.
With that out of the way, here's more on the subject.
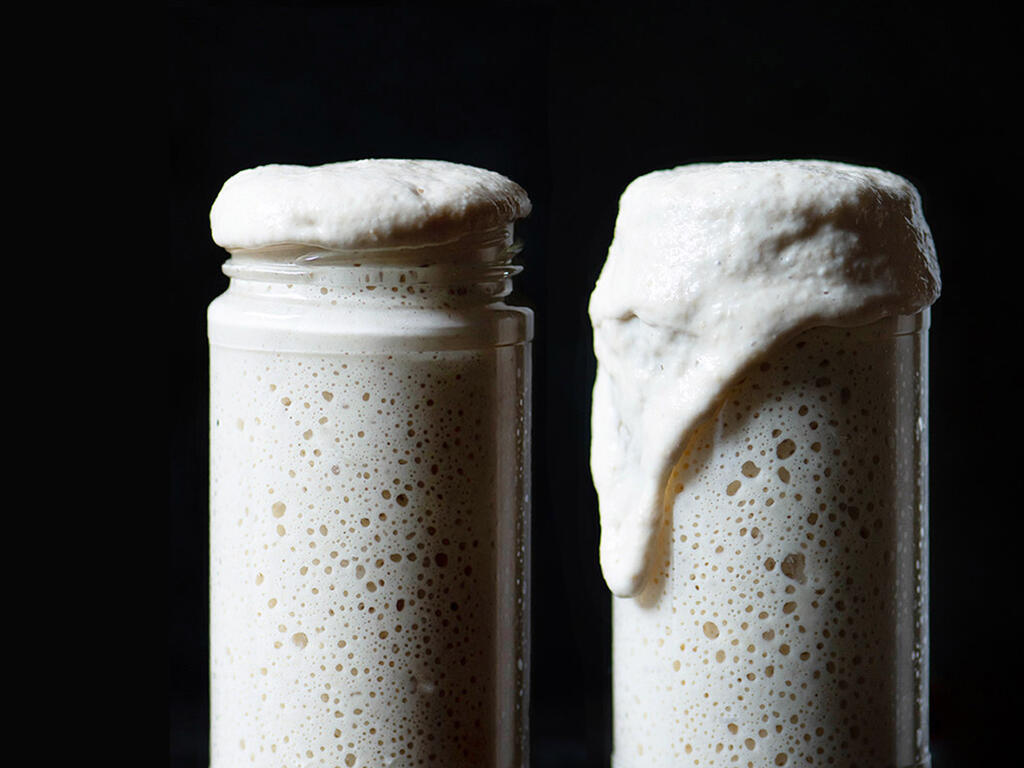
In Dave's experience, a stiffer starter has "more force". As a general rule of thumb, 100% or more hydration is considered a liquid starter and 60-65% hydration and below is considered stiff. Dave's starter is in the neighborhood of 65-70% hydration per my calculations. I decided to go with 80% hydration for my maintenance and levain build and can't give a good reason why I chose that number. Splitting the difference perhaps? Bakers are always evolving their techniques so it's possible that Dave has changed things since the class, but 65-70% is what I understood at the time.
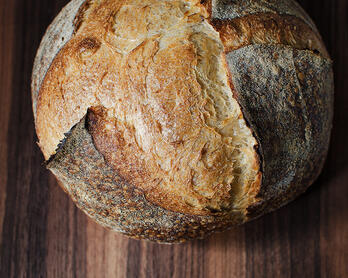
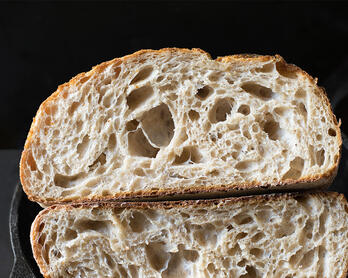
Has my move from 100% to 80% hydration made a difference? I can't say for sure but my bread (pictured) is looking great so I'm sticking with 80% for now and may bump it down to 75%. I think a combination of frequent feedings and stepped inoculations have made the most difference.
Stepped Inoculations
25% inoculation means that a feeding has 100 grams of fresh flour and 25 grams of mature starter. When Dave brings his starter out of hibernation, he does three feedings (technically four) and then steps the inoculations from 25% to 50% and then 75% before mixing his bread dough. I decided to start varying my inoculations during feedings and levain builds and my starter seems quite happy. Specifically, I rotate between 50-70% in the morning (depending on the time of day) and 30% in the evening for daily feedings. Don't we all like variety in life?
Feeding Twice a Day
I don't recall Dave explicitly suggesting this, but his method works out to be about 2 feedings a day and many experienced bakers are committed to this approach. Without question, my starter seems to have more energy and a better nose (smell) when it's refreshed twice a day. From time to time I'll only do one feeding in a 24-hour period, but if it's a couple of days from a bake I try to stick with twice a day.
Give it a Rest
Dave shared that he only bakes once a week for the local farmers market. In between bakes, he dries out the starter and stores it in the refrigerator. This is an excellent method for anyone that likes to make sourdough but can't bake regularly.
Rather than drying my starter out, I occasionally feed the starter, let it rest at room temperature for 30 minutes, then put it in the refrigerator for a couple of days if I'm not going to bake anything during the week. I suspect Dave's approach is better at maintaining the starter's health so I'm going to start rotating my food pet in and out of nap time. A portion of starter will be dried out in the fridge and then every couple of weeks I'm going to rotate the dry starter to liquid and the liquid to dry. I may even go full Dave Miller and dry out my starter between bakes. Why am I doing this? I'm curious to see what kind of bread I produce. Does the starter perform differently? Is the flavor cleaner? You never know until you try. This is more of a fun experiment than something I expect will blow my bread world open.
And with all that, let's get to the main event.
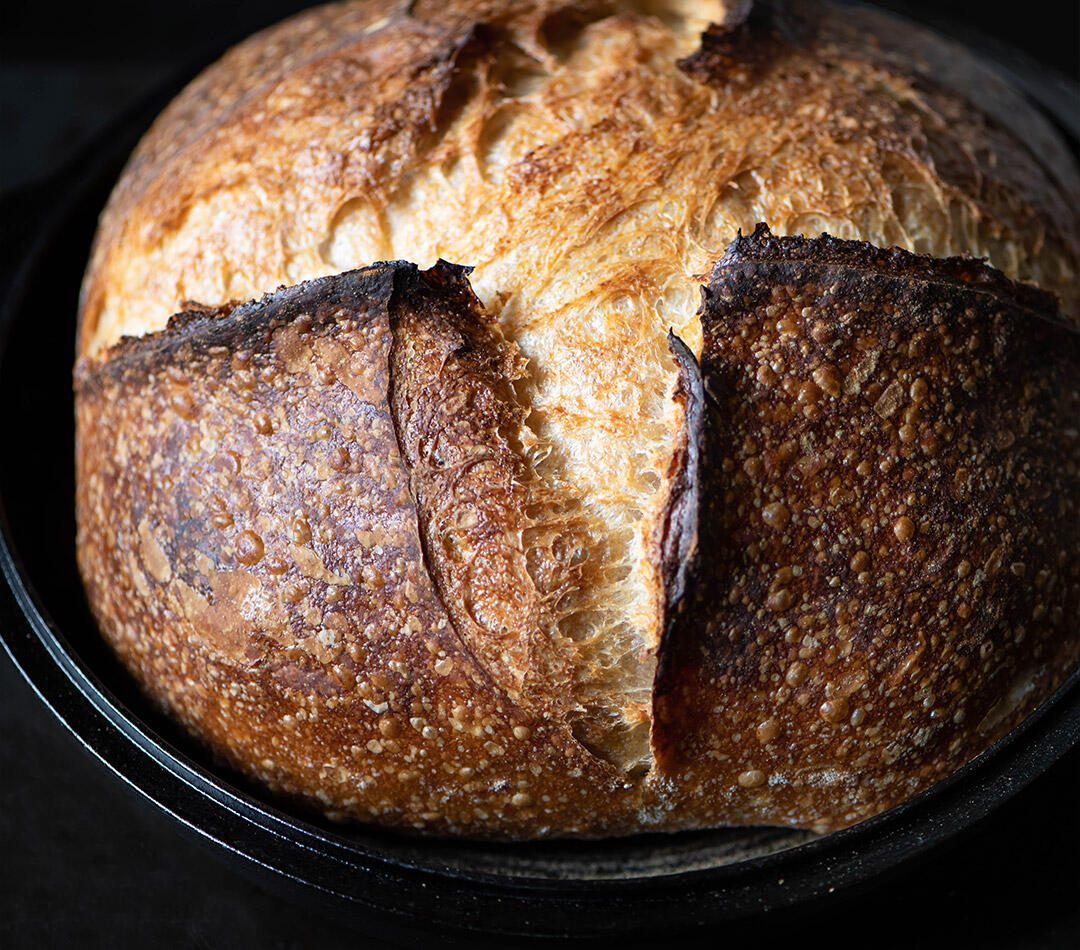
Loaf 156
Tools & Resources
- Fine Mesh Strainer
- OXO Scale // There are two scales in my kitchen. The workhorse is an OXO model that I purchased over 10 years ago and only recently had to replace. RIP scale #1. It's a sturdy cooking companion that repeatedly gets covered in flour, sauce, or whatever else is flying around the kitchen. I recommend keeping liquids away from the screen since they can find their way inside. That being said, the scale seems to dry out and keep on measuring.
- Tartine Bread // Like many bread bakers, this book got me started on my sourdough journey and occupies one of the four cookbook spots in my kitchen.
- Bread // I frequently reference this book. From recipes to bread science, it's a wealth of useful information.
- How to Build and Maintain a Sourdough Starter // This post has a number of tips to help you get up and running with a new starter.
Additional Bread Baking Tools
- Lodge Cast Iron Double Cooker - Relatively inexpensive pan that has brought endless sourdough bread joy into our life. The pan traps the steam inside during the first 20 minutes of baking (then you remove the lid) which helps develop a beautiful crust. Lodge's double cooker is also great for charring vegetables and cooking tortillas.
- Mk4 Thermapen Digital Thermometer - An important tool for managing dough temperature (DT). I have three Thermapen digital thermometers that are distributed between my home, the Airstream, and my mother-in-law's house. They're fast, easy to clean, and the probe makes a perfect cake tester.
- 9" Proofing Basket - Tartine Bread's country recipe (cut in half) is the model for my sourdough and a 9" basket works well for one shaped round of dough.
- Potato Sack Towels - I don't flour my dough when placing it in the proofing basket because I don't like flour on my top crust. Instead, I line the basket with a removable potato sack towel. To transfer the bread from the basket to the hot cast iron pan, I place an upside-down baking sheet firmly on top, turn the basket over, then remove the basket and gently peel off the towel. I can then use the baking sheet like a pizza peel and slide the shaped dough into the pan. Note that the dough that comes into contact with the baking sheet has been thoroughly dusted with a 50/50 mix of whole grain and white rice flour.
- Scoring Lame + Extra Blades - This is the only lame I've owned though there are several different kinds available. In a pinch I've used a single-edge razor but that can be a little tricky around a 500°F pan.
- Dough/Bench Scraper - My right hand tool, or rather it often functions as my right hand. When making Flaky All-butter Pie Dough, the bench scraper is essential since it allows me to chop, scrape, and fold the dough with minimal contact between the butter and my warm hand. Also a necessary tool for shaping and cutting bread dough. I have a dough scraper from Sur la Table (ruler on two sides) and Norpro (ruler on one side - Amazon). Including both options depending on where you prefer to shop.
- Plastic Bowl Scraper - Used primarily for scraping down the sides of the bowl after mixing or when transferring the dough to the work bench. The one I have came with a Central Milling order so the linked item is comparable (both are straight and trapezoidal). Perhaps a rounded side and a flat side would be more useful but I haven't bothered to research that. My free scraper has been doing a solid job for many years now.
- Large Glass Bowl - I've had the same set of nested glass bowls since college. The linked items aren't the same but a bowl is a bowl for these purposes. The glass allows you to see the bubbles forming along the bottom which helps gauge how far along the fermentation is.
Dave Miller's Sourdough Starter Maintenance
Though every baker has their own rhythm and method, I find it instructive to know how experienced folks do things. It's food for thought and encourages me to consider new approaches. Here is a breakdown of Dave Miller's sourdough starter maintenance as I understood it during the class. Not only does Dave's approach to starter maintenance minimize waste, but he feels it consistently maintains the vitality of the yeast. The method of drying and rehydrating a starter is especially appealing for those that might only want to bake a couple of times a month. I'm including hypothetical days of the week to give a sense for how this might work for a weekend baker.
Flour for Feeding
Blend together 50% Central Milling's Organic Beehive (or unbleached organic all-purpose) and 50% whole grain Sonora.
Bake and Dry - Saturday (Day 1)
After the bake:
UPDATE 7/17/23: I cut the quantity in half from the original 45 grams (3 ounces) levain and 420 grams (14 ounces) flour to 22 1/2 grams (1.5 ounces) levain and 210 grams (7 ounces) flour. This is plenty for the typical home baker.
- Combine 22 1/2 grams (1 1/2 ounces) of ripe levain with 210 grams (7 ounces) of the fresh 50/50 flour blend.
- Rub the starter and flour mixture until the starter dries out and forms little sourdough balls.
- Cover and refrigerate until needed.
No Activity - Sunday, Monday, Tuesday (Days 2-4)
- Rest
- Rest
- Rest
Rehydrate - Wednesday (Day 5)
- A couple of days before baking, use a fine mesh strainer to sift the sourdough balls out of the mixture. Set the sifted flour aside.
- Add 142 grams (5 ounces) of 80-degree water to the sourdough balls and stir thoroughly to combine. Once the balls are hydrated, add the sifted flour back in. Note: Before adding in the sifted flour, feel the starter mixture with your fingers to see if any hard bits remain. If it's still not 100% hydrated, pour the mixture through the mesh strainer and then pushed and scraped with a spatula to break up anything that gets stuck (if some small bits remain just discard those). Let the mixture sit in the bowl for a bit longer until homogeneous and then add the sifted flour back in.
- Let the mixture rise overnight at room temperature.
Build - Thursday (Day 6)
UPDATE: I hydrate my starter at 80 to 85% now but am leaving the formulas below unchanged from the original 70% hydration.
- Feed the starter in the morning with a 25% inoculation and 70% hydration. Hypothetical numbers for reference:
- 100 grams fresh 50/50 flour blend
- 70 grams filtered water
- 25 grams ripe starter
- Feed the starter in the evening with a 50% inoculation and 70% hydration. Hypothetical numbers for reference:
- 100 grams fresh 50/50 flour blend
- 70 grams water
- 50 grams ripe starter
Feed, Mix, and Shape - Friday (Day 7)
Note: The 70% hydration feeding below is what I had scribbled down because that's how Dave Miller builds his levain for a bake. If you need a 100% hydration starter (as most recipes call for), simply bump the water up to 100 grams.
- Feed the starter in the morning with a 75% inoculation and 70% hydration. Hypothetical numbers for reference:
- 100 grams fresh 50/50 flour blend
- 70 grams water
- 75 grams ripe starter
- Mix
- Shape and Refrigerate
Note: I can't recall if Dave dries the starter on Friday or Saturday so I added a feeding on Friday evening. I like that extra feeding but suppose you could just dry the starter out on Friday after mixing. That may actually be what Dave does since the starter has already been refreshed three (technically four) times. Baker's discretion.
- Feed the starter in the evening with a 50% inoculation and 70% hydration. Hypothetical numbers for reference:
- 100 grams fresh 50/50 flour blend
- 70 grams water
- 50 grams ripe starter
Bake and Repeat - Saturday (Day 1)
See instructions above.
Rip Van Moomin
I wanted to test the drying method before publishing this post so I rubbed some starter and flour together, threw the bowl in the fridge, and forgot about it...for a year. Moomin went down for a nap in July of 2017 to be exact. Always date all the things. Also, I cut the starter and flour by 1/3 and had plenty.
Since this post was burning a hole in my drafts folder, I pulled the bowl of crumbly bits out and decided to take a chance and rehydrate them. There wasn't a shred of life after 18 hours and the mixture just smelled like fresh flour. I stirred the contents of the bowl frequently and kept it around 76-78°F. I started to see some hints of activity after about 24 hours and performed another feeding. The next morning, my tiny but mighty yeast had risen. After two more feedings, Rip Van Moomin was ready to bake after its long and luxurious nap in the cheese drawer.
On that note, here are some tips:
- Use an airtight container and don't put said container in a place where the flour will pick up off odors. Cheese drawers, for example, aren't the best choice. I had to discard the flour that my starter balls were stored in because of the smell.
- Take extra care to stir the mixture several times and ensure that it's at an optimal temperature of around 78°F. Give the starter every chance to wake up and get running.
- This is very important (albeit obvious) advice. If you're going to change up your sourdough starter routine, be sure to set some aside in the refrigerator as an insurance policy. I was messing around with feedings one week and almost lost my starter. It suddenly smelled like dirty socks and I ended up mixing 4 different feedings at varying inoculations in what was effectively an ICU for yeast. Lesson learned.
Final Thoughts
Last but not least, it was so nice to meet some of my Instagram bread friends in person. Min and Noah are passionate sourdough bakers and worth a follow if you're on IG. Also, check out who they follow and you'll discover a community of people who are as curious as you are about the journey of bread baking. If you made it to the end of this post, you're solidly in the bread geek column.
I plan to publish more bread baking notes and recipes on Chic Eats, but in the meantime my Little Brown Bakery journal is always available for anyone who wants to follow along loaf by loaf.
Newsletter
Subscribe at the bottom of this page for the Chic Eats roundup. It includes new and updated recipes along with a grab bag of unique content that was interesting enough to share around the dinner table.
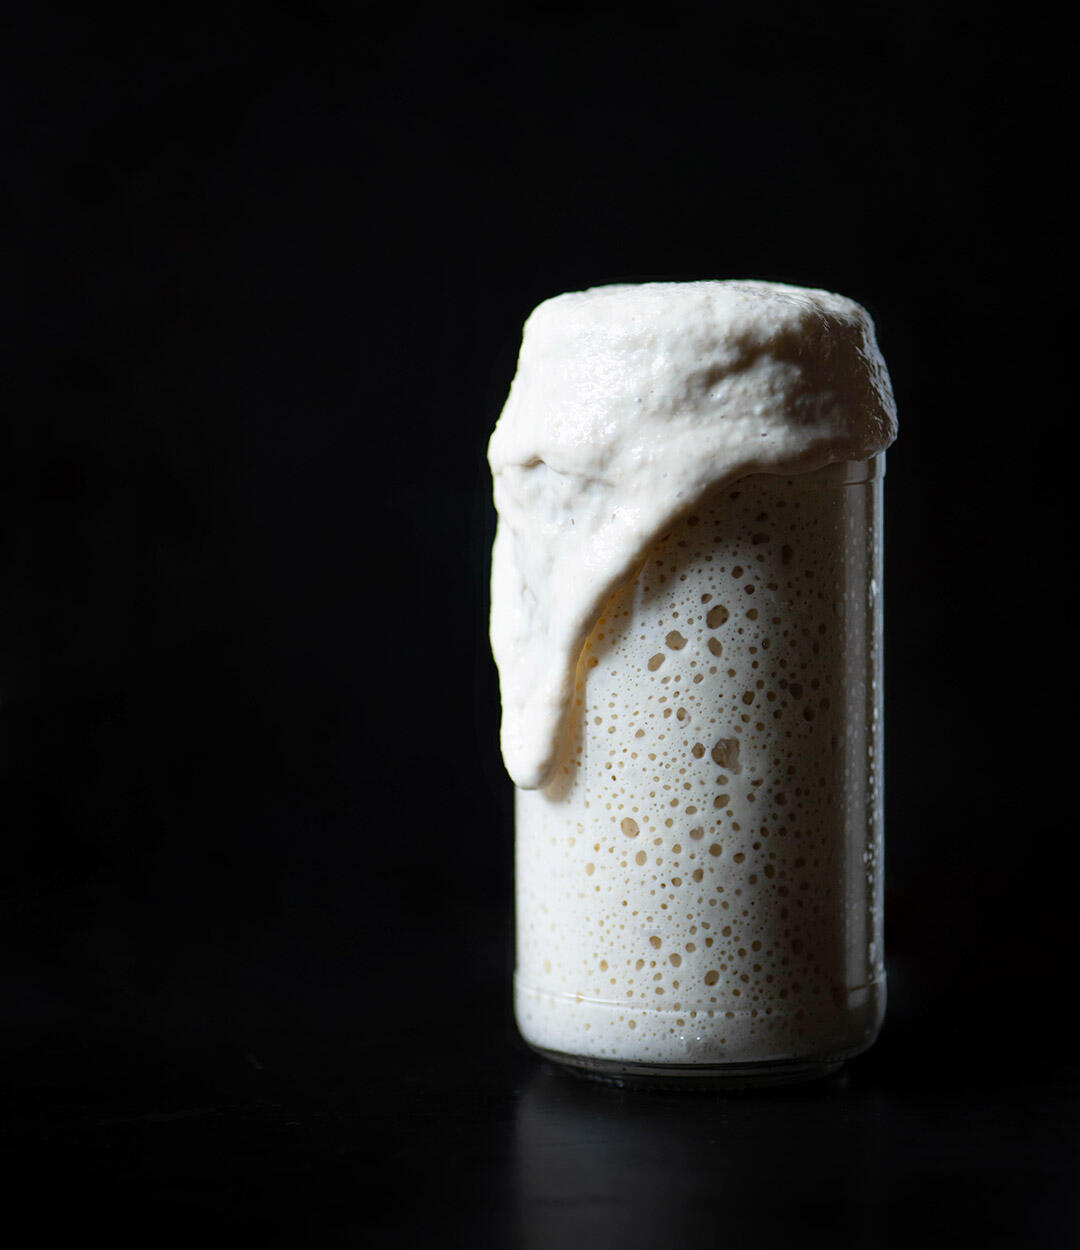
Rip Van Moomin after the third feeding.