Low-Sugar Jam (Seven Fruit Options)
RECIPE UPDATED 6/18/26
Newsletter
Subscribe at the bottom of this page for the Chic Eats roundup. It includes new and updated recipes along with a grab bag of unique content that was interesting enough to share around the dinner table.
Summer's Bounty
Greengage plums...Looking at one cut open is like gazing into the depths of an emerald. - Andy's Orchard
Maybe it was those romantic descriptions or just the heaps of beauty at the farmers market, but I fell under the spell of summer's bounty. The absence of any reasonable restraint devolved quickly from one box of greengage plums to multiple boxes of Baby Crawford peaches, more plums, and all the berries. This included some Finley Farms strawberries that I stalked for a few weeks. My eyes were far bigger than my stomach which presented an opportunity to try new things.
Two of my preferred jam makers stopped production so experimenting with preserves was a good way to put a dent in the market haul. Given my weekly sourdough baking adventures, it feels like a personal oversight that I hadn't made fruit spread up until this point.
The process is straightforward and relatively quick (in terms of hands-on work), so with each box of fruit that walked through the door I cooked a new batch. The freezer is now stocked with an assortment of strawberry, peach, greengage, olallieberry, boysenberry, Bing cherry, and raspberry preserves. My toast + jam ambitions are unchained.
I went into the project with a couple of objectives: use less sugar than what's customarily in jam and skip the canning step seeing as I'm not (yet) a full-fledged preserver. This recipe is for folks who want a taste of warmer days in December but aren't planning to boil jars. You won't end up with a sealed product that can sit in the pantry for a year but you can certainly freeze it for that long. I froze the cooked spread in Ball jars. Safety notes under "Recipe Tips". Also, the refrigerated preserves have lasted for over a month without issue so even with less sugar they have staying power.
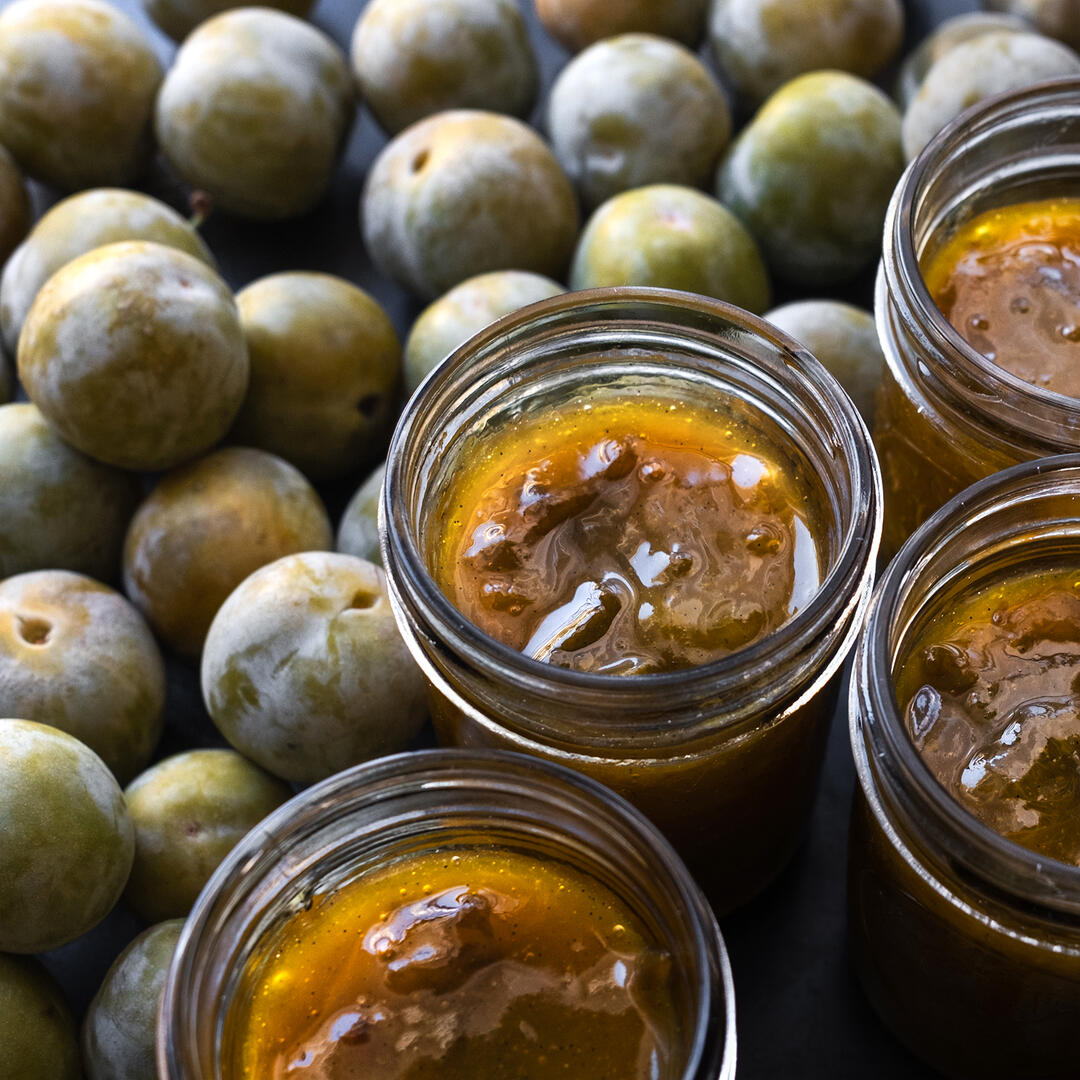
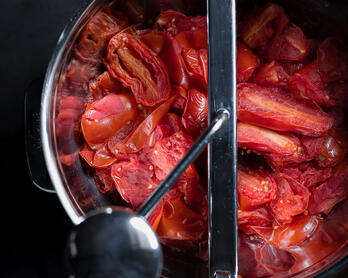
Greengage Plum Jam // Andy's Orchard
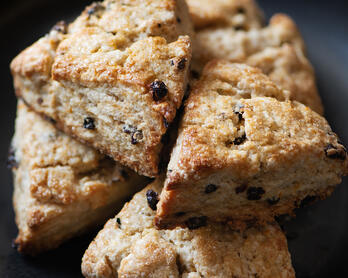
It's tough to pick a favorite from my jam session. Both the strawberry and raspberry preserves are what every berry aspires to be when it puts "become fruit spread" on its vision board -- the essence of peak flavor turned up to 11. The peach is also outstanding and adding it to steel cut oats with sliced almonds and a pinch of mahlab tastes like a luxury. Not to be forgotten is a dollop of peach with Zuni Cafe's Orange-Currant Scones.
The greengage fruit spread and its silky texture also turned out beautifully. The flavor profile is a little more delicate with notes of the holidays courtesy of clove and vanilla undertones. At one point, David Zilber mentioned adding applesauce to the bottom of an apple tart which gave me the idea to use greengage jam in an apple galette -- outcome TBD.
Dialing the acid and sugar up or down as needed is the art and pleasure of this process. The idea behind this post is to both memorialize 2023's notes and offer a jumping off point in terms of ratios for anyone else who may be saving the season. Making preserves is a science, but my experience is there's plenty of wiggle room for mistakes and adjustments.
Surround yourself with people who believe in your dreams and like toast.
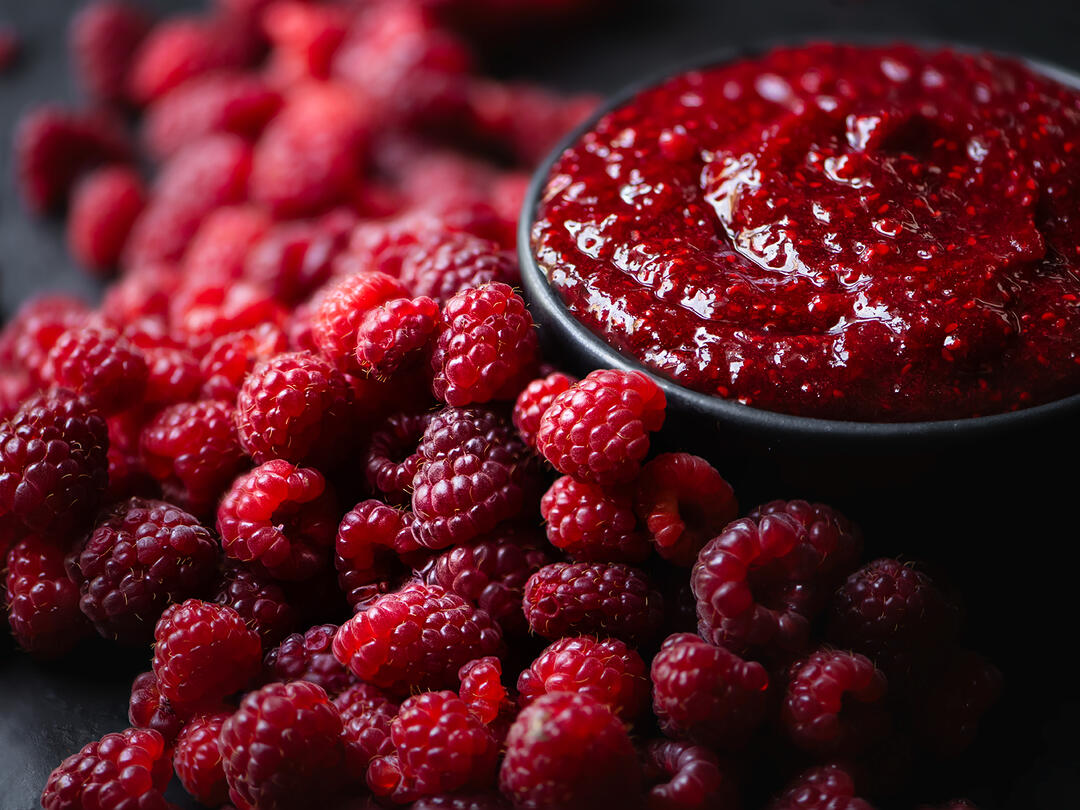
Raspberry Jam // 2 Peas in a Pod
Housekeeping
Gentle Reminders
- This is not a proper canning recipe. I don't know the pH of the respective fruit spreads and can't speak to it being safe for that process.
- This is not a "freezer jam" -- that type of preserve isn't cooked.
Preservation Police
As I understand it, texture and sugar quantity are qualities that distinguish jelly, jam, preserves, fruit butter, and fruit spreads from one another. To make a long and murky explanation short, the recipes below aren't jelly or fruit butter but they do fall somewhere in the netherworld of fruit spread, jam, and preserves. For the sake of getting on with things this is just an acknowledgment that I'm not entirely sure what the technicalities are. That said, "jam" and "preserves" roll off the pen a little easier than "fruit spread" and what I make has a jammy texture. I'm going to live recklessly and mix terms -- come for me Internet.
Recipe Tips
Breaking Point
My preference is that jars not explode in the freezer so I found these tips helpful. So far there have been no explosions to speak of.
- A shouldered jar isn't recommended for freezing. Straight sided is the way to go and buying a quality jar is also a good idea. I went with jelly and 8-ounce jars from Ball. On the east coast I found them at grocery and hardware stores, on the west coast it was mainly grocery stores or online.
- The jam will expand as it freezes so leave at least a 1/2-inch of head room.
Doneness
There are a number of Internet tips for this one: the plate in the freezer, how the mixture drips off the spoon ("sheeting"), and temperature. I found that a combination of my eyes and digital thermometer was the best gauge for doneness though I did the plate test at the end for good measure. The texture I wanted was set enough to have structure when spread but not jelly-like. These are the tips that I found helpful.
- Bubbles: Watch the bubbles from start to finish and you'll see the transformation from runny to spreadable pretty clearly. The bubbling transitions from sporadic with varying sizes to uniform and like "blinking fish eyes" as one website accurately described.
- Sheeting: Take your spoon and stir the jam then hold it up above the pot and watch the texture as it drips off. At the beginning of the process, the texture will be be quite runny with individual drops. As things progress, do this test a few more times and you'll start noticing that it "sheets" off the spoon rather than dripping like a thin liquid.
- Plate Test: Place a small plate in the freezer for 5 minutes. When you think the jam is done, add a small dollop (a teaspoon is enough) to the chilled plate and put it back into the freezer for one minute. Take the plate out and push your finger through the jam. The top should wrinkle a little. You can also tip the plate sideways and the jam should defy gravity. I've found that when the bubbles, temperature, and sheeting are on point the plate test is always a pass.
- Temperature: UPDATE: Since I started macerating the fruit overnight, I find that it sets faster and at a seemingly lower temperature—200°F to 205°F. My goal is always to maintain the brightest flavor possible so I aim focus more on the visual cues than the temperature. With that said, here are the notes I had from when the fruit was macerated the same day:
- OLD NOTES: There's some science about pectin setting in the range of 215 to 217°F. I did find that my jam reached a desirable texture once it was in that range—well set but easily spreadable. Several recipes suggest 220°F is the target but my fruit didn't quite get there and I'm glad I didn't keep cooking it. Once I had the right bubbles, sheeting off the spoon, and the plate test was successful, there was no point in breaking the fruit down further.
- Skin: I'm not 100% sure about this tip...more of an observation from my 2024 jam session. I noticed that when I took the pot off the heat (for the strawberry and olallieberry batches), the preserves that had reached the setting stage started to form a slight skin on the top when the temperature dropped to 175°F. I wouldn't rely solely on this visual cue but it seemed worth sharing.
Continued below...
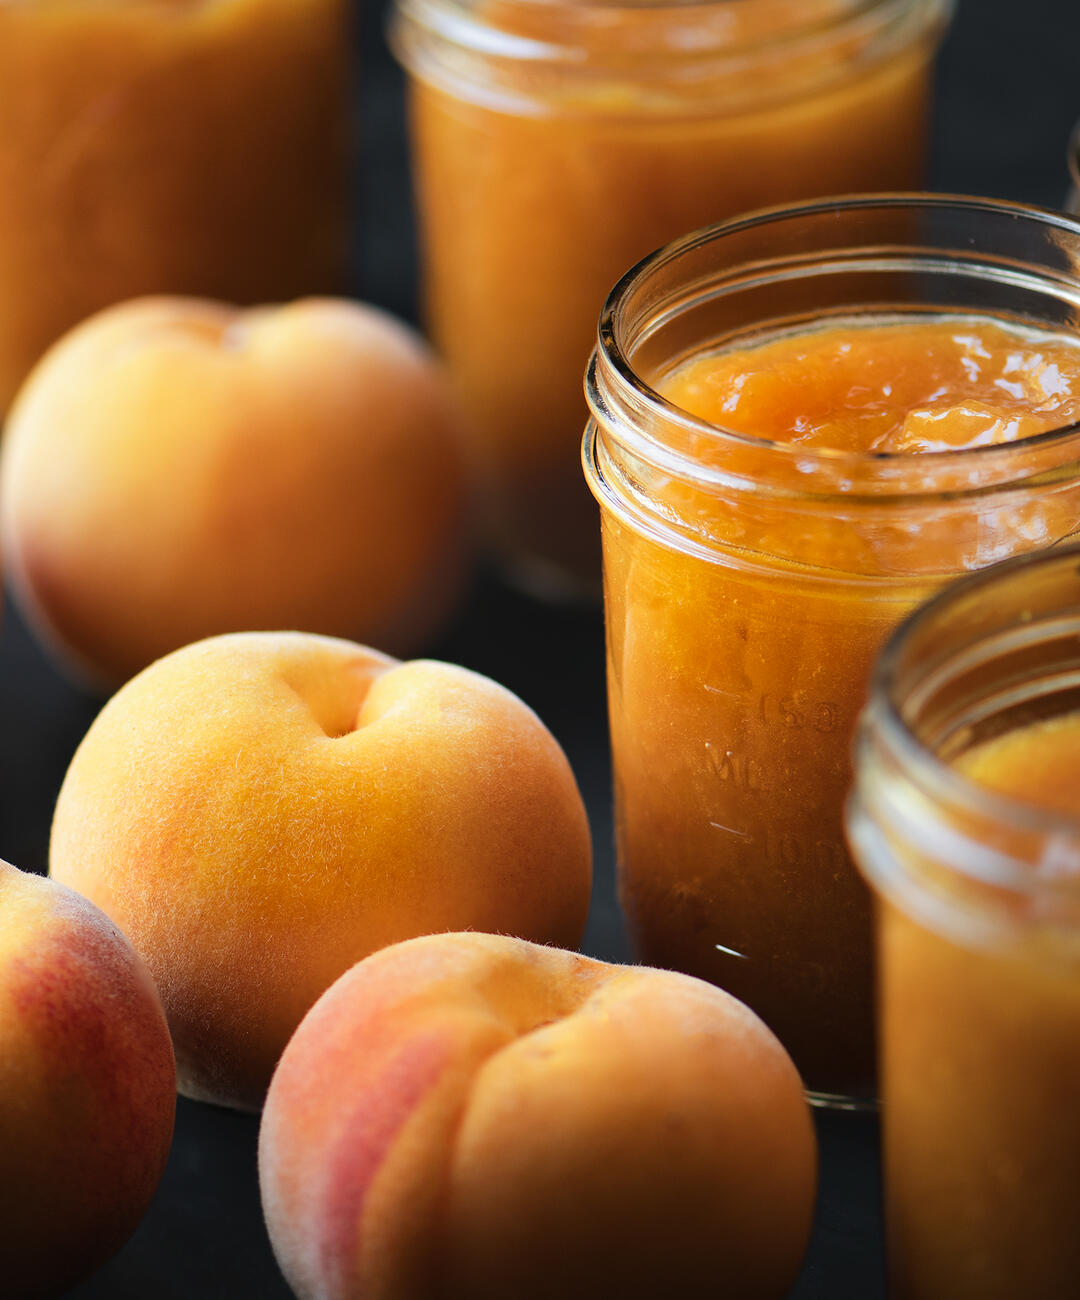
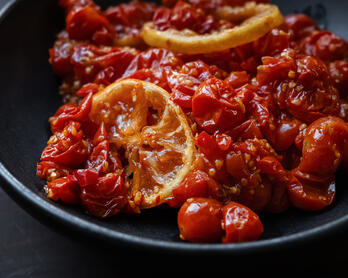
Baby Crawford Peach Jam // Andy's Orchard
Adjustments
- Setting: Of the
fiveseven jams I made, none of them seemed to have an issue setting to the desired firmness -- I can turn the jars over and the spread defies gravity. If a jam sets too hard, gently warm it in a pot and add some liquid (water, Cara Cara orange juice) until the texture seems correct and the plate test passes. Do this sparingly. - Sweetness: I didn't start with enough sugar when making the raspberry jam and had to adjust up at the end. To do this, I added the sugar and brought the mixture back to a steamy bubble just long enough to make sure the sugar was incorporated.
Pectin
Greengage plums are naturally high in pectin and sugar so they set up on their own and didn't need pectin. For the strawberry, raspberry, peach, boysenberry, Bing cherry, and olallieberry, I used Pomona's Universal Pectin since it works with lower sugar recipes and seems like a relatively clean product. It was also the only pectin available at the store.
Gear
Here are a few additional notes I jotted down.
- Wooden spoons and copper jam pots are a mainstay in the jammer's gear. I used an All-Clad stainless pot instead of copper but did use a wooden spoon. I wondered why most websites suggested that utensil and found two reasons: 1) Metal transfers heat and cools the jam. 2) Metal utensils can scratch the copper pot. The latter point wasn't a concern but the wooden spoon I could get behind.
- I didn't boil the jars but I did run them through the dishwasher. The lids and seals were cleaned with hot soapy water.
- Growers sometimes offer "firsts" and "seconds" fruit where the latter is on the riper side, maybe has some damage, or is otherwise undesirable to sell on the table. I used "firsts" that were in prime condition. My logic focused on giving the preserves as much opportunity as possible to last in the refrigerator once opened.
What Floats Your Boat
Taste a jam that you like and consider what you enjoy about it to determine what you're target end product is. Is it a pure fruit flavor? Spiced? Is there acidity or lemon that you can identify? Is it particularly sweet? My two reference jams are a marionberry from Trinidad and strawberry from Katz (sadly out of production). Both tasted very much of the berries with enough acidity and sugar to amplify the fruit's best qualities but not so much that I was distracted by or even really noticed it.
The recipes below are relatively neutral/balanced but a little more citrus juice or even zest can add additional zing if you prefer that. In terms of honey, the flavor can take over pretty quickly so I use it sparingly.
Farmers | Artisans
I make an effort to source my food from California artisans with a special focus on the Santa Monica Farmers Market. Below is a list of the folks who contributed to this dish.
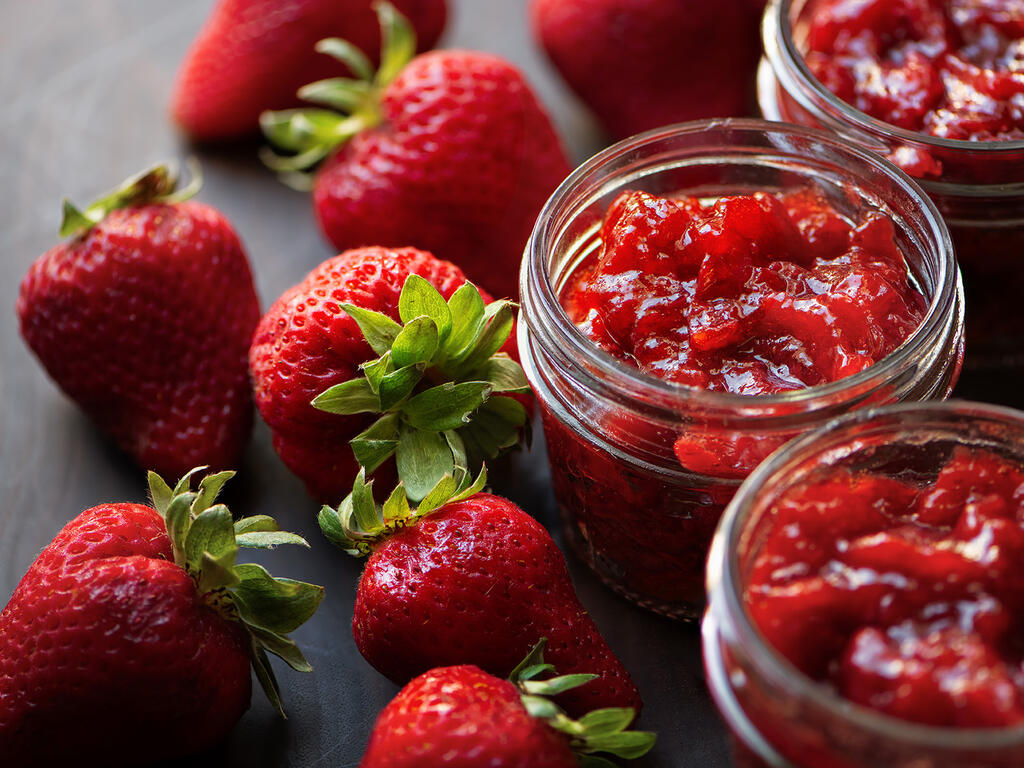
- Finley Farms // Strawberries
- Andy's Orchard // Greengage Plums, Baby Crawford Peaches, Bing Cherries
- 2 Peas in a Pod // Raspberries, Olallieberries, Boysenberries
- Polito Family Farms // Citrus
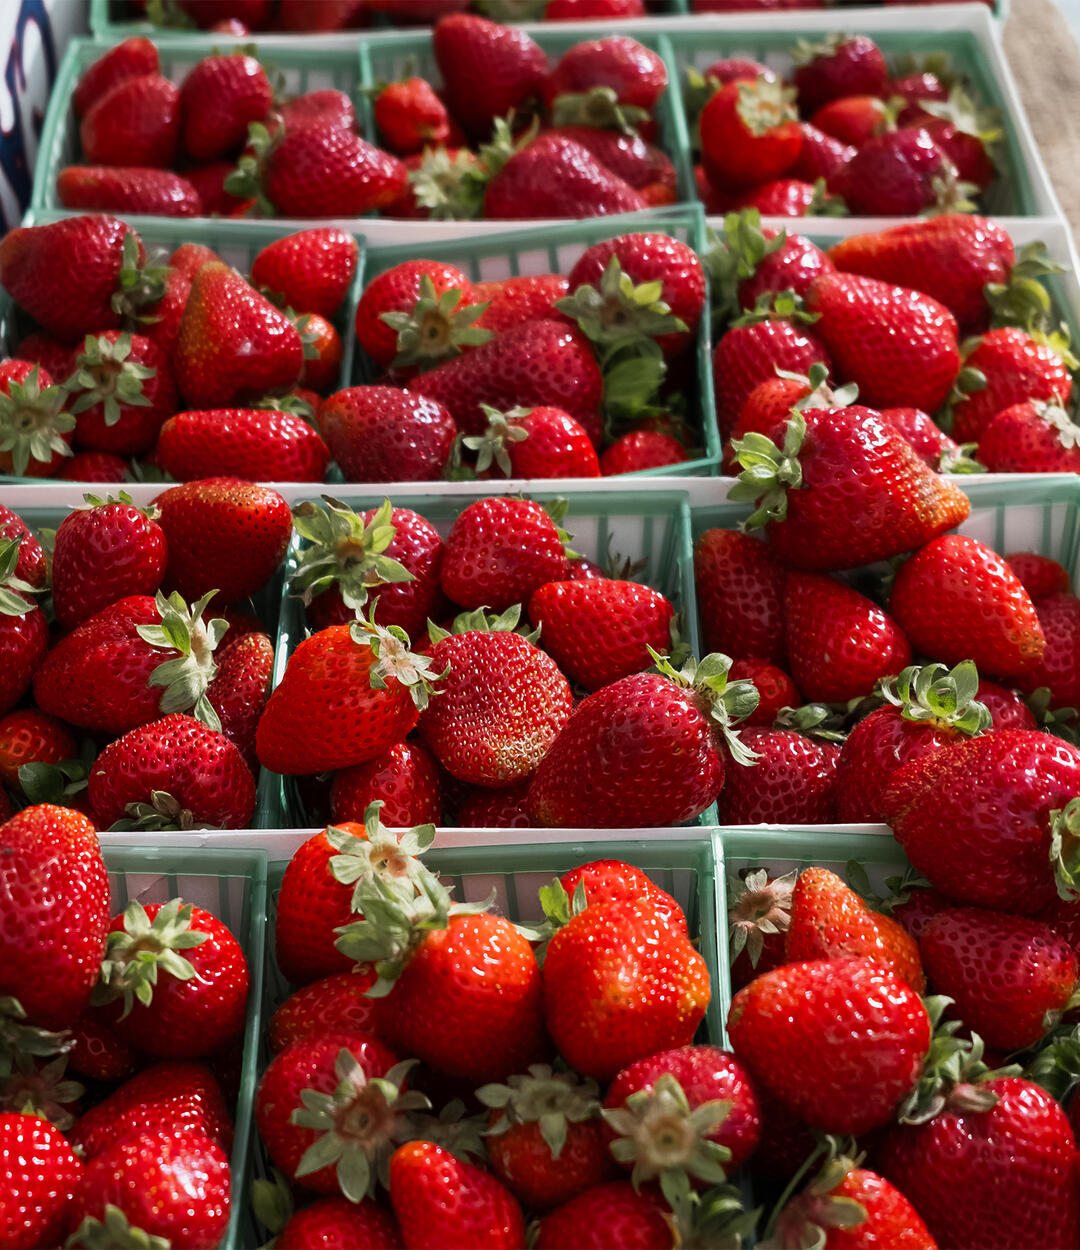
Strawberries at Finley Farms // Santa Monica Farmers Market
Tools
If I could choose one tool for jam making, it would be a digital thermometer. Between that and your eyes it's relatively easy to nail the firmness with each batch of preserves. I'm still using the linked "classic" from ThermoWorks but understand the upgraded ONE is also good.
My Favorite Cooking Tools spotlights the kitchen equipment I’ve owned and used for years from bread baking to coffee brewing.
Reference Chart
I was making multiple flavors of jam and needed a quick reference guide when portioning the ingredients so this chart was born. Full disclosure is that it assumes you have read the rest of the recipe.
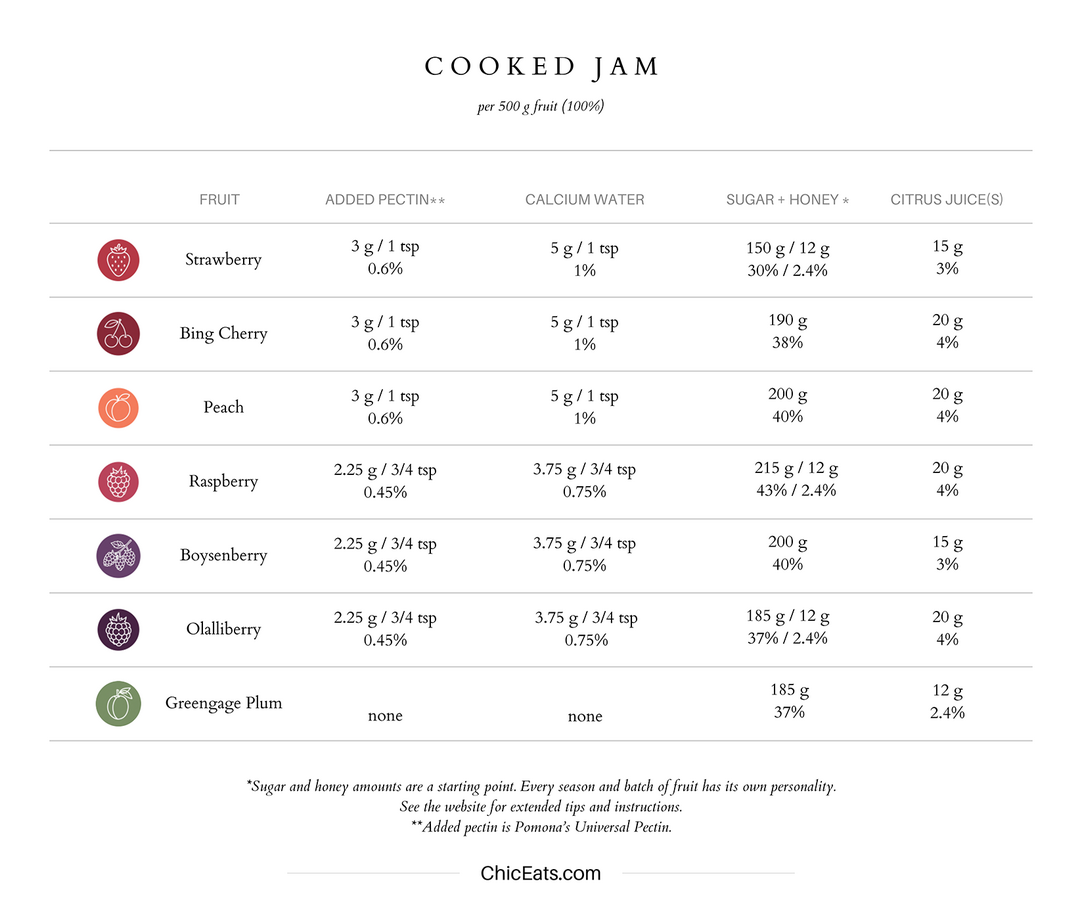
Ingredients (Approximately 3 8-ounce jars per 500 grams of fruit)
Below are the ratios for the various preserves that I made. Sugar is a starting point since every season and batch of fruit has its own personality. I always lean tart over sweet since the acidity pairs well with how I like to use it—especially with butter.
Other than the greengage plum jam (which doesn't require pectin), my fruit spreads are made with Pomona's Universal Pectin. Each brand of pectin explains how much you want to include for a given amount of fruit so follow those instructions.
Strawberry
- 500 grams strawberries, stems removed and halved (measured after prep) // 100%
- 15 grams fresh lemon juice // 3%
- 150 grams organic cane sugar // 30%
- 12 grams honey // 2.4%
- 1 teaspoon (3 grams) pectin (Pomona's Universal Pectin) // 0.6%
- 1 teaspoon (5 grams) calcium water (Pomona's Universal Pectin) // 1%
Bing Cherry
- 500 grams pitted bing cherries (weighed after prep) // 100%
- 10 grams fresh lemon juice // 2%
- 10 grams fresh Cara Cara orange juice // 2%
- 190 grams organic cane sugar // 38%
- 1 teaspoon (3 grams) pectin (Pomona's Universal Pectin) // 0.6%
- 1 teaspoon (5 grams) calcium water (Pomona's Universal Pectin) // 1%
- A little more citrus juice or a couple scrapes of orange zest at the end if desired
Peach
- 500 grams peaches, peeled and pitted (weighed after prep) // 100%
- 10 grams fresh lemon juice // 2%
- 10 grams fresh Cara Cara orange juice // 2%
- 200 grams organic cane sugar // 40%
- 1 teaspoon (3 grams) pectin (Pomona's Universal Pectin) // 0.6%
- 1 teaspoon (5 grams) calcium water (Pomona's Universal Pectin) // 1%
- A little more citrus juice or a couple scrapes of orange zest at the end if desired
Raspberry
- 500 grams raspberries // 100%
- 215 grams organic cane sugar // 43%
- 12 grams honey // 2.4%
- 20 grams fresh lemon juice // 4%
- 3/4 teaspoon (2.25 grams) pectin (Pomona's Universal Pectin) // 0.45%
- 3/4 teaspoon (3.75 grams) calcium water (Pomona's Universal Pectin) // 0.75%
- A few scrapes of lemon zest added at the end as desired
Boysenberry
- 500 grams boysenberries // 100%
- 15 grams fresh lemon juice // 3%
- 200 grams organic cane sugar // 40%
- 3/4 teaspoon (2.25 grams) pectin (Pomona's Universal Pectin) // 0.45%
- 3/4 teaspoon (3.75 grams) calcium water (Pomona's Universal Pectin) // 0.75%
Olallieberry
- 500 grams olallieberries // 100%
- 10 grams fresh lemon juice // 2%
- 10 grams fresh orange juice // 2%
- 185 grams organic cane sugar // 37%
- 12 grams honey // 2.4%
- 3/4 teaspoon (2.25 grams) pectin (Pomona's Universal Pectin) // 0.45%
- 3/4 teaspoon (3.75 grams) calcium water (Pomona's Universal Pectin) // 0.75%
Greengage Plum
- 500 grams greengage plums, halved and pitted (skins left on -- measured after prep) // 100%
- 185 grams organic cane sugar // 37%
- 12 grams fresh lemon juice // 2.4%
- 1/4 vanilla bean
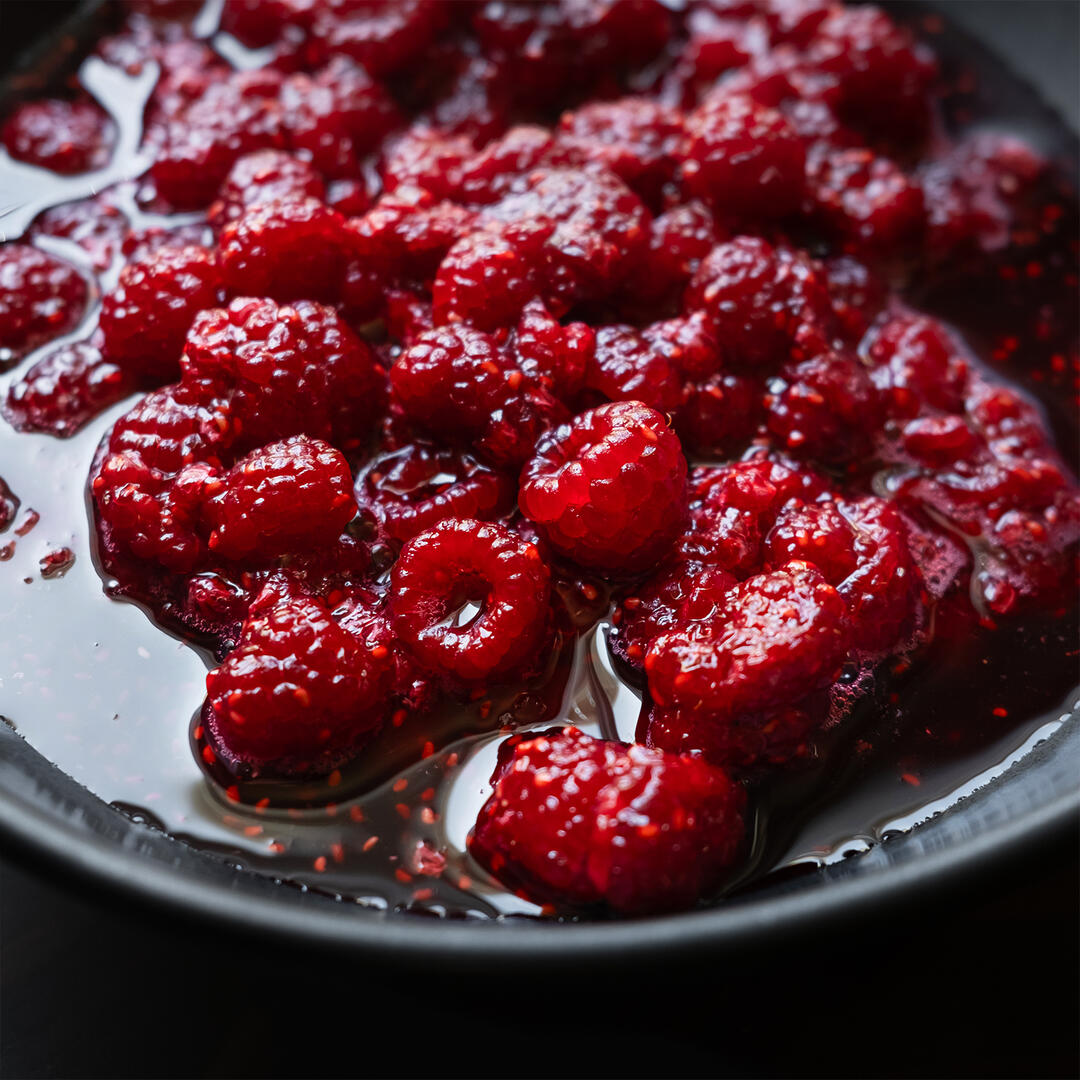
Macerated Raspberries // 2 Peas in a Pod
Instructions
Greengage plums don't need pectin or calcium water but the process is the same otherwise.
Jar Prep
- Run the jars through the dishwasher and wash the lids/rings with hot soapy water. I usually do this a day or two in advance. Make sure they're completely dry since tap water is generally not something you want in preserves or ferments.
Macerate
- In whatever pot you plan to cook in, combine the prepped fruit, 3/4 of the sugar, honey (if using), and citrus juices. Thoroughly combine then set aside for an hour, stirring a couple of times during that period. You're reserving 1/4 of the sugar to mix with the pectin.
UPDATE: Some cookbooks recommend macerating the fruit overnight so I gave that a try with 2024's jam session (specifically strawberries, peaches, and olallieberries). They were absolutely swimming in juice by the next morning. The jam reached its setting point faster and had a silkier texture. It's not a required step, but less cooking means brighter flavor so I plan to macerate overnight moving forward.
Cook
- Add the calcium water and vanilla bean (if using - scraping the seeds into the pot along with the pod) to the macerated fruit, stir thoroughly, then bring the fruit and all of its juices to a simmer over medium to medium-high heat. Once at a simmer, sprinkle the sugar/pectin mix over the pot and stir thoroughly. Continue to stir frequently to prevent sticking.
- After about 10 minutes of cooking, gently mash the fruit to help break it down. Bring back to a simmer for a couple of minutes and take a temperature reading.
- Continue cooking while going through the "Doneness" checkpoints: bubbles, sheeting, temperature. When macerated overnight, the jam takes less than 15 minutes to reach 200 to 205°F and it's close to done at that point. Fruit that's macerated the day of cooking seems to require a bit more cooking.
- Once the jam has passed all the tests (15 to 20 minutes give or take) transfer to a bowl to cool. Taste the preserves and add a little orange or lemon zest if you want more brightness. It's easy to overdo this so start small. Cover and refrigerate. Note: I like to refrigerate the jam overnight before spooning it into the jars. This gives me an opportunity to see how the texture sets and correct for any issues like I had with the peach jam.
Freeze
- Spoon the jam into jars leaving a 1/2 inch of headroom, pop a top on, label, and freeze or refrigerate.
Shelf Life
- Refrigerator: I've experimented over the last year and the shelf life lines up pretty closely with the sugar levels. The greengage jam can hang out in the refrigerator for months on account of the sugar in the fruit. The strawberry had the shortest refrigerator life but was still plenty stable -- I never felt rushed to finish a jar.
- Freezer: The frozen jam will likely last until next season if I don't eat it first. UPDATE: I opened some 2023 jars 8 months after putting them in the freezer and they are still very good.
Newsletter
Subscribe at the bottom of this page for the Chic Eats roundup. It includes new and updated recipes along with a grab bag of unique content that was interesting enough to share around the dinner table.